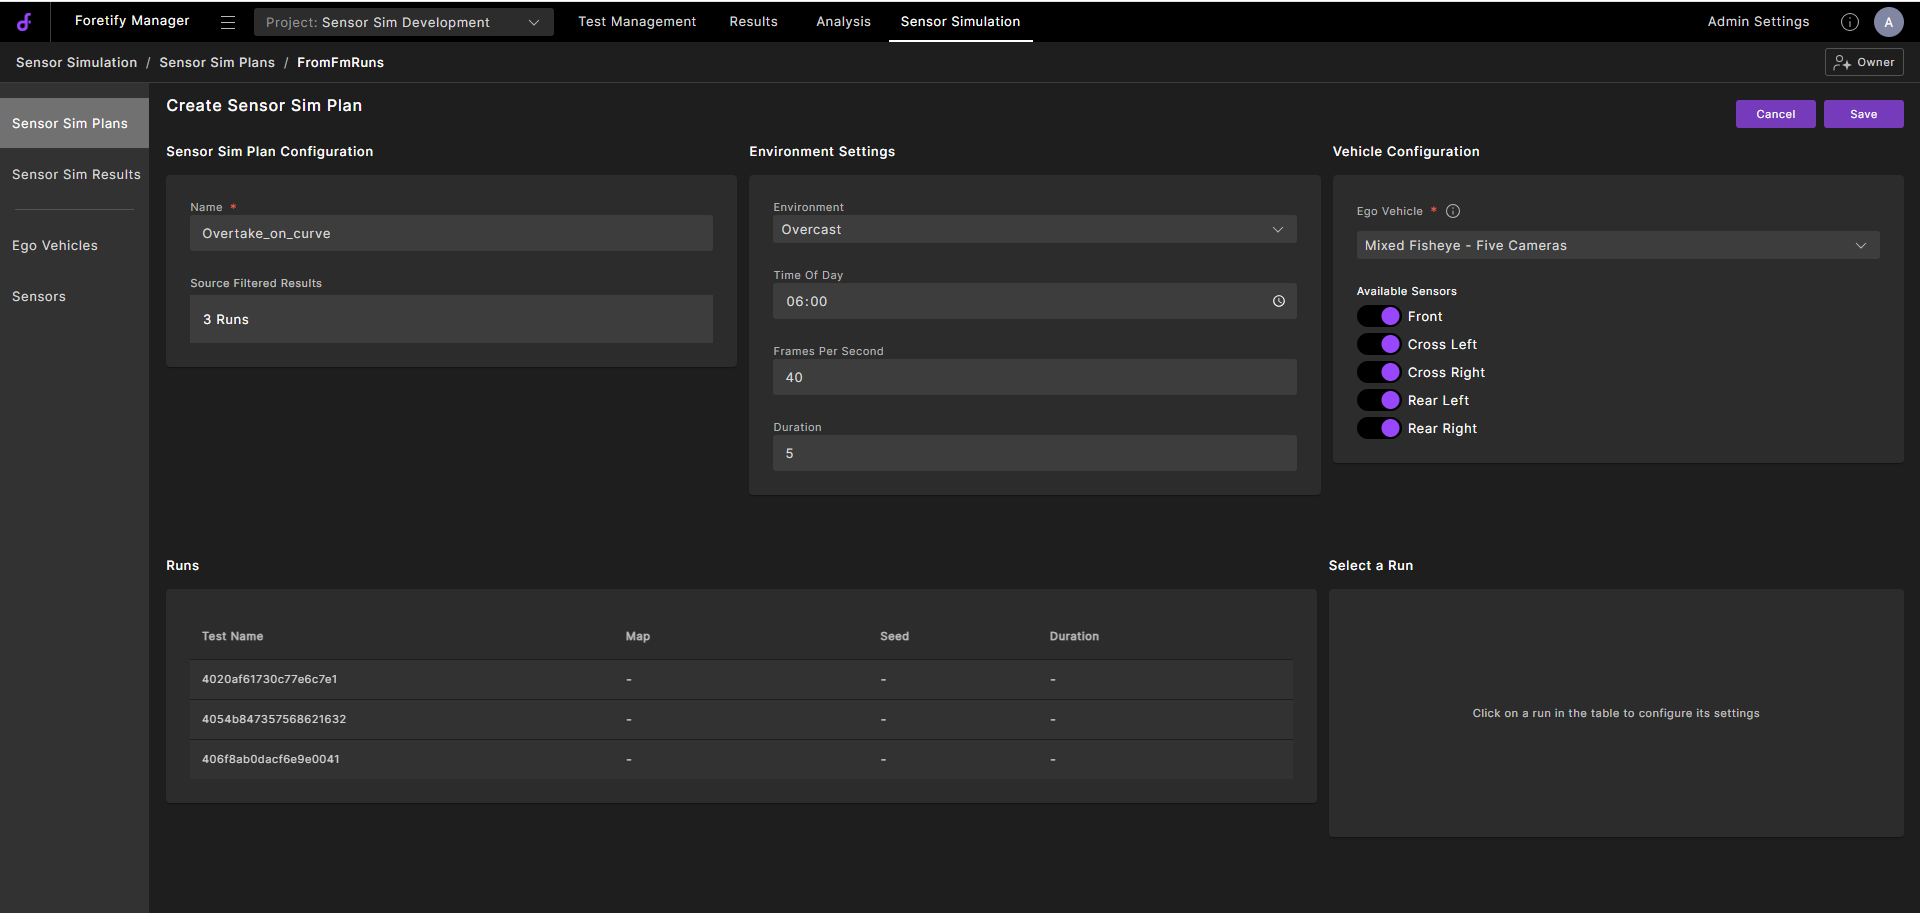
Creating Sensor Sim Plans
Creating Sensor Sim Plans from filtered Object Sim Results
You can use filtered Object Sim Results to create a Sensor Sim Plan. The filtered set you select as the source ensures the SSP runs on exactly the OSR runs you curated.
-
In the Filtered Object Sim Results section, select the filtered results you want to render and click Create Sensor Sim Plan.
The Create Sim Sensor Plan view opens.
-
Under Sensor Sim Plan Configuration
- Name: Enter a name for your Sensor Sim Plan.
-
Under Environment Settings, select from the available options to set the environment for sensor data creation:
-
Environment: Select the cloud cover:
- Cirrus
- ClearSky
- CumulusHeavy
- CumulusLight
- Overcase
-
Time of Day: Set the time for the simulation.
-
Frames Per Second: Enter the number of data samples (image frames, point clouds, etc.) to capture per second of simulated time. Higher FPS produces smoother, more detailed output but generates more data and takes longer to render.
-
Duration: Duration of the generated clip.
-
-
Under Vehicle Configuration:
- Select the Ego Vehicle type.
- Select from the Available Sensors for each type of Ego vehicle.
-
Click on a run to configure its settings.
-
Click Save to create the plan.
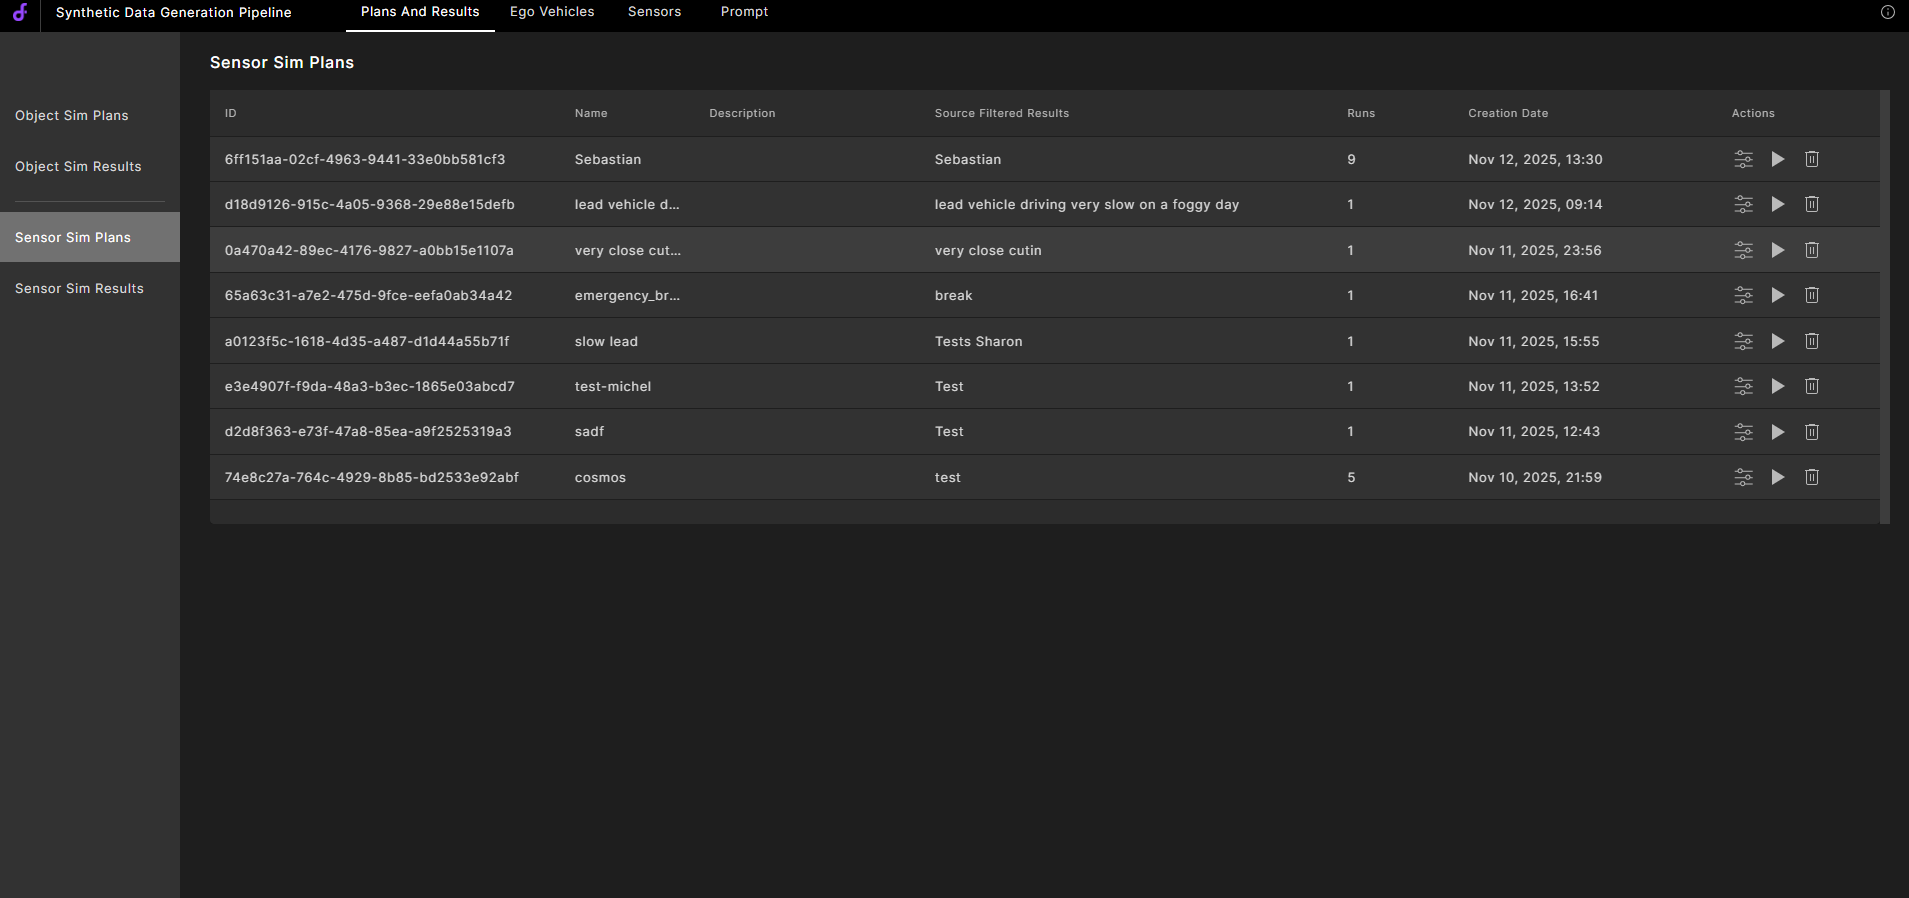
The plan is displayed in the Sensor Sim Plans view.
Creating Sensor Sim Plans from Foretify runs
-
In Foretify Manager, click the Project dropdown in the top navigation bar and select the project that contains the runs you want to use.
-
Click Results in the top navigation bar, then select Runs in the left sidebar.
-
Browse the list of available runs and use the checkboxes to select the ones you want to generate sensor data for.