72. VPlan views
VPlan views helps you explore workspace results without changing the base VPlan. They serve as a view-specific working copy derived from the base. Selecting a view updates only the current workspace, and other workspaces are unaffected; teammates using the same workspace will see the selected view.
72.1 Key characteristics of a VPlan view
- The created VPlan view inherits all elements of the base VPlan, including its sections, items, references, checkers, and attributes such as weights, targets, filters, and their inclusion or exclusion states. See Analyzing metrics for details.
- The inclusion or exclusion states can be modified in VPlan views to meet specific configuration requirements.
- The connection between a VPlan view and its base VPlan is one-directional; updates in the base VPlan affects its views, but the views do not affect the base VPlan. This makes the VPlan view a suitable environment for exploring data, analyzing coverage, or managing different team requirements as the project evolves.
- A single base VPlan can have multiple VPlan views, each receiving updates from the base VPlan independently, without affecting other views.
- You can switch between views in the workspace to analyze results from different perspectives; switching recalculates grades and is optimized for quick feedback.
72.2 Creating a VPlan view
-
Select a base VPlan base from the All VPlans table.
Note
A base VPlan is any VPlan which does not have a VPlan view icon.

-
Click the Create VPlan View icon.
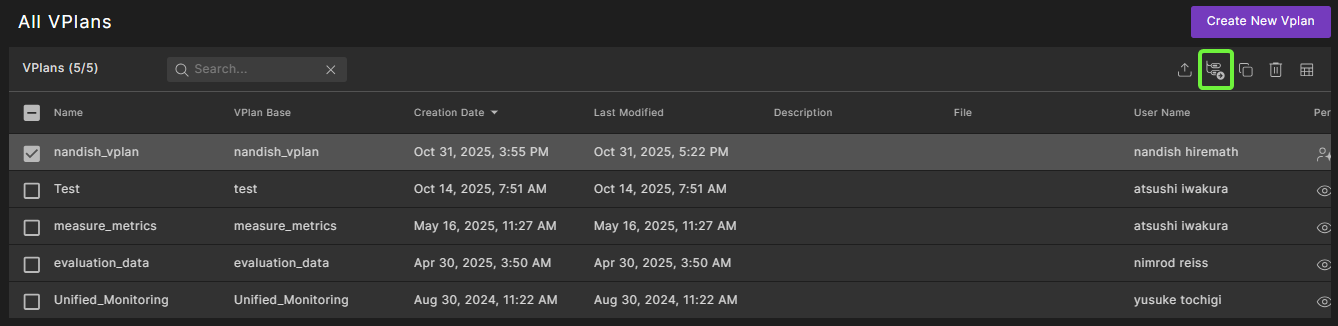
The Create New VPlan View dialog box appears.
-
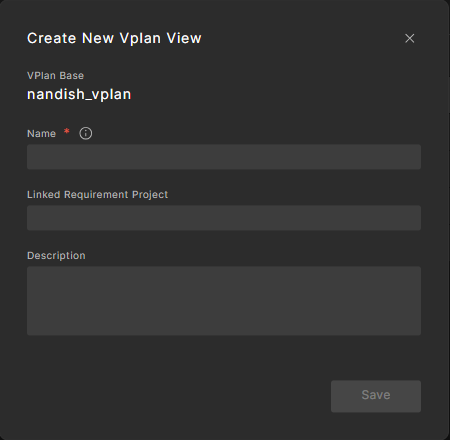
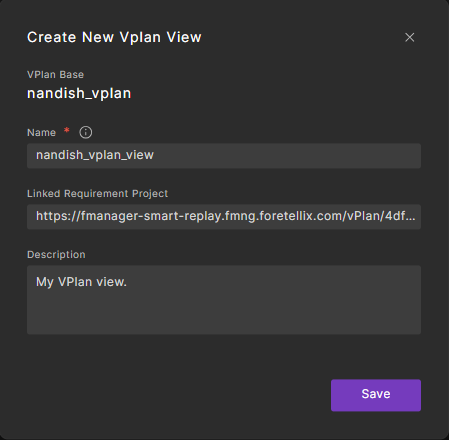
Enter a unique name for this base, optionally add a linked project requirement and description, and click Save. A linked requirements project is an optional association between your VPlan (or VPlan view) and a project in a supported Requirements Management Tool (RMT). It enables syncing and cross-navigation between Foretify Manager and your requirements system.
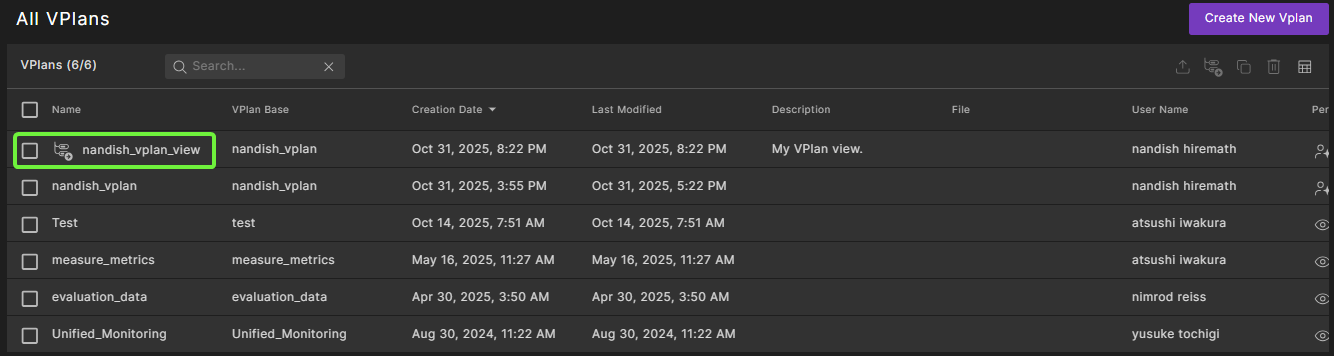
The new created VPlan view appears in the All VPlans table.
Note
You cannot edit a VPlan view.
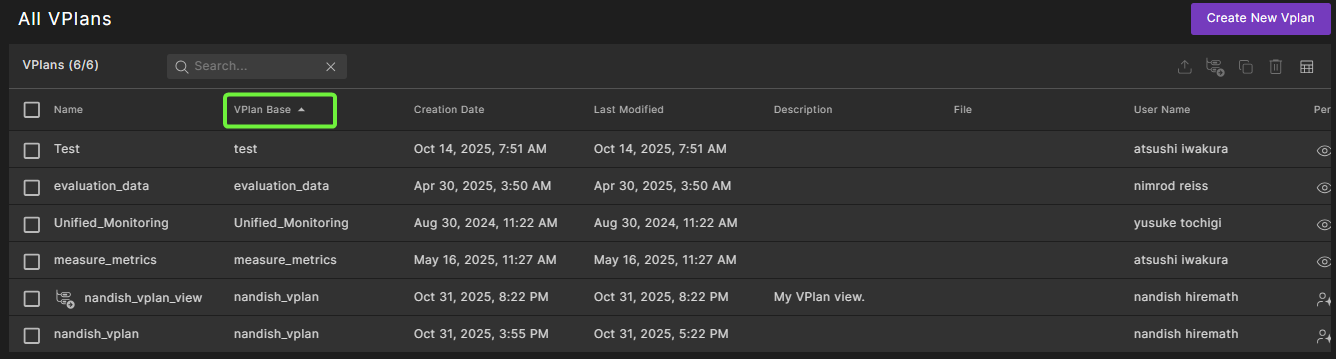
72.3 Sorting a VPlan view
Sort the VPlan table by the “VPlan Base” column to group each base VPlan with its connected views. Grouping uses an internal unique ID, so it works even when names aren’t unique. The base and its views share the same value in this column, so they appear together.
72.4 Using a VPlan view to explore data
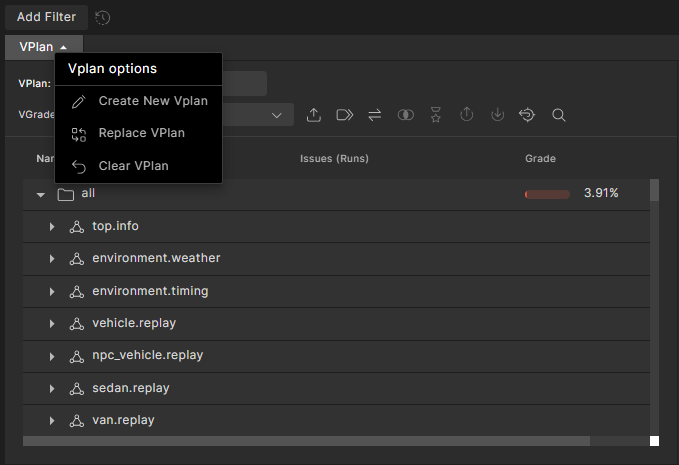
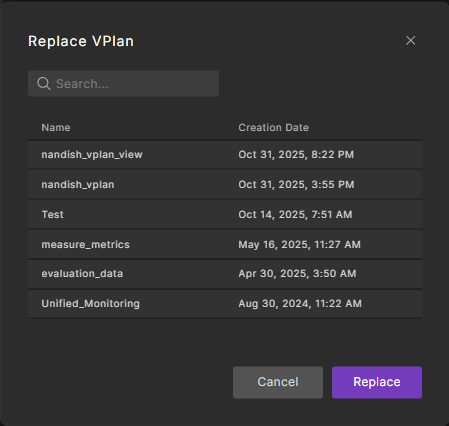
To select a specific VPlan view in the workspace's VPlan tab, you can do one of the following:
-
Click the VPlan dropdown, select Replace VPlan, choose the required VPlan view, and then click Replace.
-
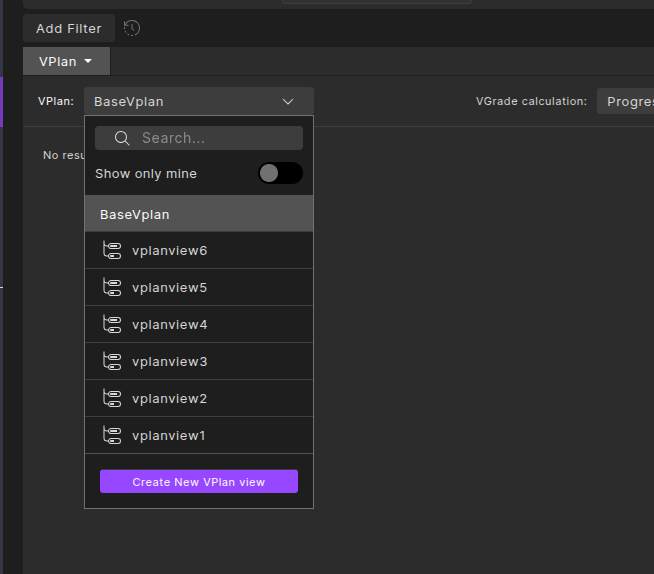
Click the VPlan view switcher dropdown and select the required VPlan view. This option is available only if at least one view is connected to the currently selected base VPlan.
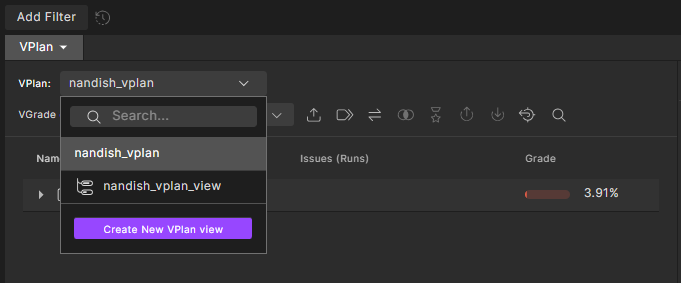
Enable Show only mine to display only your views, and hide all views not created by you.
72.5 Modifying the VPlan view
After selecting a VPlan view, you can change the status of each VPlan node to Include or Exclude, just as in the base VPlan. These changes apply only to the selected view and do not affect other views or the base VPlan. Similarly, setting or resetting targets affects only the active view.
Example: Suppose there is a base VPlan named VPlanBase with two associated views: VPlanView1 and VPlanView2. Initially, no VPlan item is excluded. If you switch to VPlanView1 and set a node to Excluded, the node and its children appear greyed out, affecting the VGrade. If you then switch back to the base VPlan (VPlanBase) and change the same node’s status, VPlanView1 remains unaffected because changes in a specific view override the base. However, VPlanView2, which has no specific setting for that node, will reflect the updated status from VPlanBase.