38. Environment Settings
Environment settings are the configuration options that define the conditions for a simulation or test run. These settings can include parameters such as the simulation step time, the map, and other simulation-specific configurations.
38.1 Creating Environment Settings
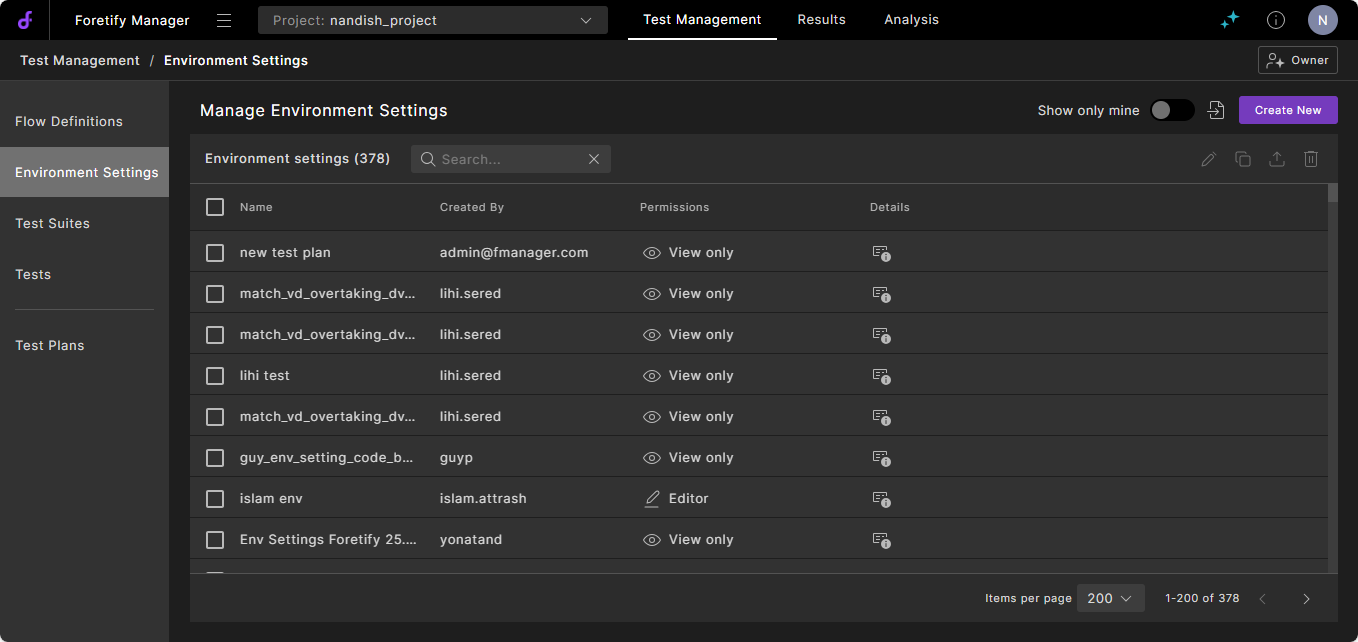
To create environment settings, go to your project, click the Test Management tab, and then select Environment Settings > Create New.
In the Create New Environment Settings window, enter the information as described in the following sections.
38.1.1 Foretify job fields
A Foretify job runs a test scenario. It includes a Foretify container and optional additional containers, depending on the configuration of the Simulator Support Package (SSP), Simulator, System Under Test Support Package (DSP), and System Under Test (SUT).
| Field | Description |
|---|---|
| Setup file | The script to configure the execution environment before running Foretify. If no setup scripts are specified, the default script, ftx_setup.bash, is executed. If custom setup scripts are provided, the default script is skipped. |
| Run timeout | The maximum time, in seconds, that Foretify waits for a test run to complete. If the run exceeds this time, Foretify terminates it. |
| Priority | Defines the importance of a Foretify job. Depending on the load balancing strategy, it affects the job execution order. |
38.1.2 Foretify job: Image
The Image fields define configurations for the Docker image used to create the Foretify container. These fields are required when Foretify runs in a cloud environment.
The Image setting includes both the image name and the registry. This Docker image is used to launch the test suite (via the FRun proxy) and to run the Foretify jobs it contains.
| Field | Description |
|---|---|
| Image name | The name of the Docker image, including its tag. |
| Registry | The registry that holds the image. This registry accepts either the full registry URL or a registry name recognized by the orchestrator. |
| Add Orchestrator Options to Image Container | Orchestrator-specific options for running the container. Click Add to add an Option and its Value. Click + Add Option to add additional options. |
38.1.3 Foretify job: Add Runtime Options
| Field | Description |
|---|---|
| Add Runtime Options | The Foretify command line options used as flags when executing jobs. Click Add to enter an option and its value. For a complete list of available options, see Foretify invocation. |
38.1.4 Foretify job: Environment variables
| Field | Description |
|---|---|
| Environment variables | Environment variables to configure within Foretify container and any other containers used for the test. Click Add to create key/value pairs, where the key is the variable name and the value is assigned during container setup. Note: The FMANAGER_USER is a default environment variable within every job container that stores the username of the Foretify Manager user who launched the test suite. |
38.1.5 Foretify job: Add Compute Requirements
Compute requirements define the hardware resources needed to run Foretify effectively. Click Add to specify these requirements.
| Field | Description |
|---|---|
| CPU Count | CPU core allocation for the container. |
| GPU Count | GPU allocation for the container. |
| Memory Limit | Maximum memory the container can use. If usage exceeds this limit, the container might be terminated. |
| Memory Request | Recommended memory allocation for running the container. |
38.1.6 Foretify job: Integration
The Integration fields define the configuration for integrating the System Under Test (SUT) and the simulator with Foretify. There are two main types of integration:
-
DSP (System Under Test Support Package): Manages communication and synchronization between Foretify and the SUT. For details, see Integration: Add DSP.
-
SSP (Simulator Support Package): Manages simulator-side integration. For details, see Integration: Add SSP.
38.1.6.1 Integration: Add DSP
The DSP (System Under Test Support Package) manages communication and synchronization between Foretify and the System Under Test (SUT). Click Add to configure the DSP fields.
| Field | Description |
|---|---|
| Command | The command to start the DSP process within the DSP container. This command is used only if a DSP image is defined. |
38.1.6.1.1 DSP Image
The DSP Image fields define configurations for the Docker image used to create the DSP container. These fields are required only if the DSP runs in a separate container.
| Field | Description |
|---|---|
| Image name | The name of the Docker image, including its tag. |
| Registry | The registry that holds the image. This registry accepts either the full registry URL or a registry name recognized by the orchestrator. |
| Add Orchestrator Options to Image Container | Orchestrator-specific options for running the container. Click Add to add an Option and its Value. Click + Add Option to add additional options. |
38.1.6.1.2 DSP Compute Requirements
The Add Compute Requirements fields define the hardware resources needed to run the DSP container effectively. Click Add to specify these requirements.
| Field | Description |
|---|---|
| CPU Count | CPU core allocation for the container. |
| GPU Count | GPU allocation for the container. |
| Memory Limit | Maximum memory the container can use. If usage exceeds this limit, the container might be terminated. |
| Memory Request | Recommended memory allocation for running the container. |
38.1.6.1.3 DSP: Add SUT
These fields define the configuration parameters that control the execution of the SUT. Click Add to specify settings.
| Field | Description |
|---|---|
| Command | The command to start the SUT process within the SUT container. This command is used only if an SUT image is defined. |
| Connection String | The SUT's host and port number for DSP connection. For example, localhost:54321. |
38.1.6.1.3.1 DSP: SUT Image
The Image fields define configurations for the Docker image used to create the SUT container. These fields are required only if the SUT runs in a separate container.
| Field | Description |
|---|---|
| Image name | The name of the Docker image, including its tag. |
| Registry | The registry that holds the image. This registry accepts either the full registry URL or a registry name recognized by the orchestrator. |
| Add Orchestrator Options to Image Container | Orchestrator-specific options for running the container. Click Add to add an Option and its Value. Click + Add Option to add additional options. |
38.1.6.1.3.2 DSP: SUT Compute Requirements
Compute requirements define the hardware resources needed to run the SUT container effectively. Click Add to specify compute requirements for the container.
| Field | Description |
|---|---|
| CPU Count | CPU core allocation for the container. |
| GPU Count | GPU allocation for the container. |
| Memory Limit | Maximum memory the container can use. If usage exceeds this limit, the container might be terminated. |
| Memory Request | Recommended memory allocation for running the container. |
38.1.6.2 Integration: Add SSP
The Simulator Support Package (SSP) manages communication and synchronization between Foretify and the simulator. It adapts to the simulator's API for simulation control and data exchange. Click Add to configure the SSP fields.
| Field | Description |
|---|---|
| Command | The command to start the SSP process within the SSP container. This command is used only if an SSP image is defined. |
38.1.6.2.1 SSP Image
The SSP Image fields define configurations for the Docker image used to create the SSP container. These fields are required only if the SSP runs in a separate container.
| Field | Description |
|---|---|
| Image name | The Docker image name, including tag. |
| Registry | The registry that holds the image. This registry accepts either the full registry URL or a registry name recognized by the orchestrator. |
| Add Orchestrator Options to Image Container | Orchestrator-specific options for running the container. Click Add to add an Option and its Value. Click + Add Option to add additional options. |
38.1.6.2.2 SSP Compute Requirements
Compute requirements define the hardware resources needed to run the SSP container effectively. Click Add to specify compute requirements for the container.
| Field | Description |
|---|---|
| CPU Count | CPU core allocation for the container. |
| GPU Count | GPU allocation for the container. |
| Memory Limit | Maximum memory the container can use. If usage exceeds this limit, the container might be terminated. |
| Memory Request | Recommended memory allocation for running the container. |
38.1.6.2.3 SSP Simulator
The Add Simulator to SSP fields specify the configuration parameters that control simulator execution.
| Field | Description |
|---|---|
| Command | The command to start the simulator process within the simulator container. This command is used only if a simulator image is defined. |
| Connection string | The SSP's host and port number for simulator connection. For example, localhost:54321. |
38.1.6.2.3.1 SSP Simulator Image
The SSP Simulator Image fields define configurations for the Docker image used to create the simulator container. These fields are required only if the simulator runs in a separate container.
| Field | Description |
|---|---|
| Image name | The name of the Docker image, including its tag. |
| Registry | The registry that holds the image. This registry accepts either the full registry URL or a registry name recognized by the orchestrator. |
| Add Orchestrator Options to Image Container | Orchestrator-specific options for running the container. Click Add to add an Option and its Value. Click + Add Option to add additional options. |
38.1.6.2.3.2 SSP Simulator Compute Requirements
Compute requirements define the hardware resources needed to run the SSP simulator effectively. Click Add to specify compute requirements for the SSP simulator.
| Field | Description |
|---|---|
| CPU Count | CPU core allocation for the container. |
| GPU Count | GPU allocation for the container. |
| Memory Limit | Maximum memory the container can use. If usage exceeds this limit, the container might be terminated. |
| Memory Request | Recommended memory allocation for running the container. |
38.1.6.3 Custom parameters
Custom parameters enable passing additional data to the system without modifying the API.
| Field | Description |
|---|---|
| Parameters | Enter or select the name of the custom parameter. |
| Value | Enter or select the value associated with the parameter. |
| + Add Option | Click + Add Option to define another parameter-value pair. |
38.1.6.4 Advanced fields
| Field | Description |
|---|---|
| CRun limit | FRun uses crun to run each row of the CSV file with the number of executions matching the “runs” entry. Each crun execution runs as a separate Dispatcher job. The crunLimit property limits the number of runs per job execution to a value smaller than that specified by the "run" entry. For example, setting crunLimit: 6 ensures that each job executes no more than 6 runs, regardless of the CSV file's content. The total number of runs remains unchanged; the system merely splits them into more jobs. Note: This option is ignored when dispatcher.enableOptimizeCrunLimit is true and dispatcher.defaultInitialCrunLimit is defined in the Foretify Manager application.properties file. This behavior is the default. In this case, an adaptive optimization algorithm controls the crun limit. For more details, see Crun optimization. |
| Allow Duplicate Runs | A boolean value. When true, FRun allows creating the same test (with the same seed) several times when it parses template files. By default, FRun removes such duplicates as an optimization. For example, you can use this flag for determinism verification. |
| Use Configured Parallelism | When this option is set to true, it overrides CRun Limit. Instead, it takes the dispatcher.parallelism value from application.properties and calculates CRun Limit to be: (number-of-runs/dispatcher.parallelism). |
| Required Licenses | Select one or more licenses. This allows the server to manage and allocate them across concurrent jobs without exceeding license limits. |
38.2 Importing Environment Settings
Effective with the 24.04.0 release, environment settings are exclusively configured via the user interface. Configuration of environment settings through JSON files is now deprecated.
To import an environment settings definition from a JSON file
-
From your project, click the Test Management tab and select Environment Settings.
-
Click the Import Environment Settings icon, select the JSON environment settings file from your system, and click Open.
The JSON parameters are imported and are reflected in the form.
-
Click Create to save the imported configuration.
If you imported the JSON into an existing configuration, click Save.
It is also possible to export the environment settings section of the test plan by clicking the Export Environment Settings as JSON icon.