49. Creating a workspace
This section describes how to create and work within workspaces.
49.1 Creating a new workspace
-
In Foretify Manager, select a project to work in:
- If you're on the All Projects page, click the required project.
- If you're in a project, click the Projects dropdown list and select a project.
-
In your project, select the Analysis tab and click Create New Workspace.
-
Enter a Workspace name.
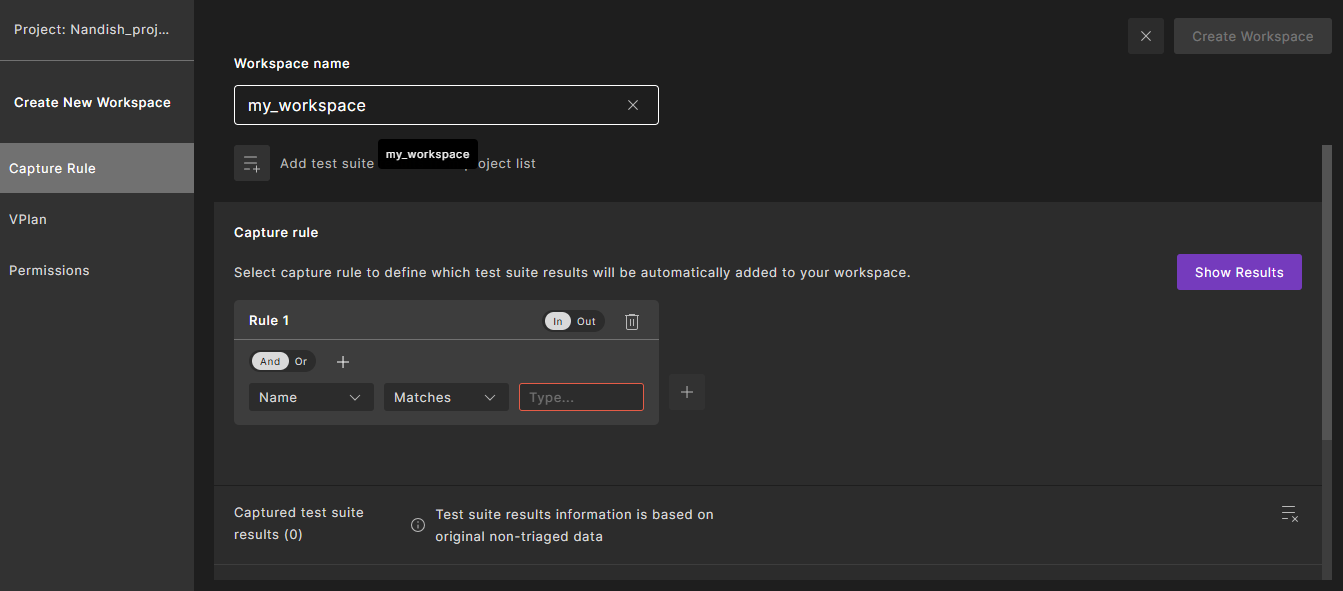
The workspace name must be unique across your project.
-
(Optional) To add test suite results explicitly, click the icon next to Add Test suite results from the project list, select one or more test suite results, and click Apply.
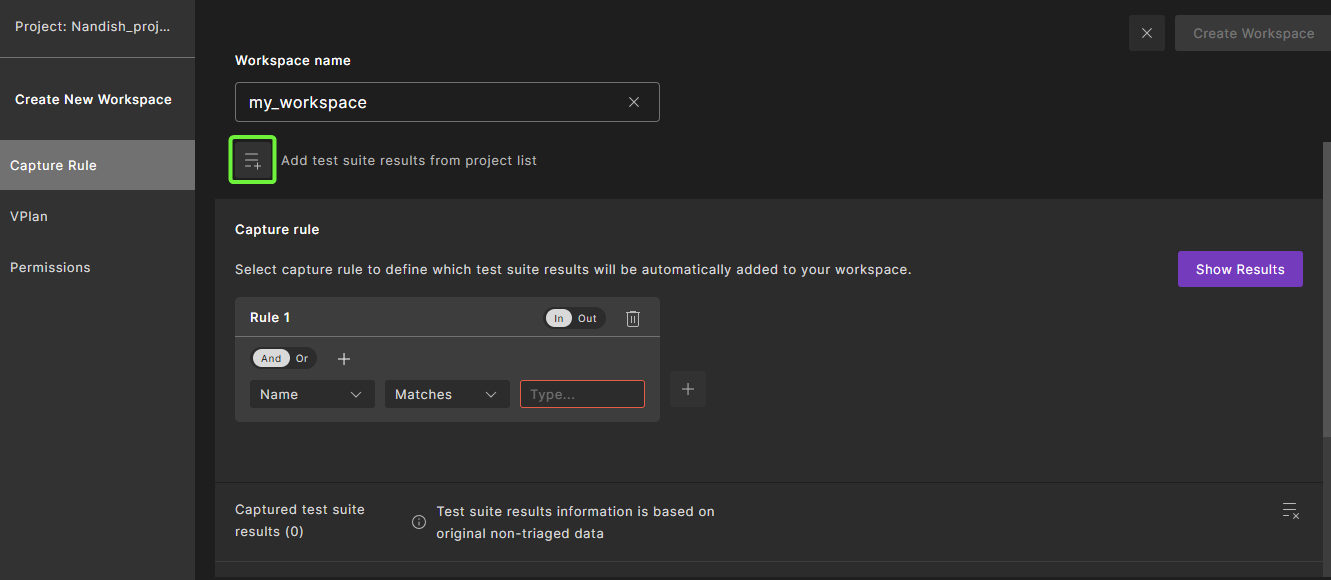
The results display under Captured test suite results at the bottom.
-
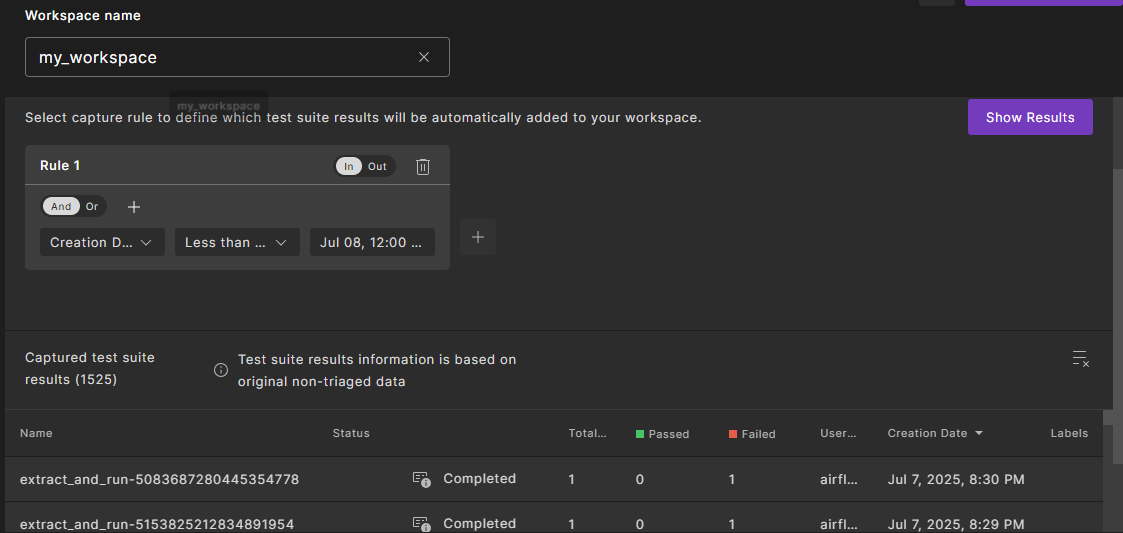
Define a capture rule.
A capture rule is the workspace’s auto‑selection filter that defines which test suite results are included in the workspace, both now and as new results arrive. This keeps the workspace “up to date” without manual picking of runs or test suite results.
The capture rule can combine multiple conditions (using AND/OR logic) and can include attributes including ID, Name, Creation Date, Passed, Failed, Errored, Total runs, User Name, Status, and Labels.
a. Click + to the right of Rule 1 to add a new rule.
b. For Rule 1, select In to include or Out to exclude the matched test suites.
c. Select an attribute from the first list.
d. Select an operator from the second drop-down menu.
The operators depend on the attribute you selected in the first drop-down menu. For example, if you selected Passed, you can select Equals, Less than, Less than or equal to, Greater than, or Greater than or equal to and enter the number in the text box.
e. In the text box, enter the string to be compared.
f. To add another condition box, click And or Or and click the + button next to the And/Or toggle.
g. Click Show Results to see the test suites that were selected based on your capture rule.
h. (Optional) To explicitly remove test suite results that the rule would include, click the Remove icon, select one or more test suite results, and click Apply.
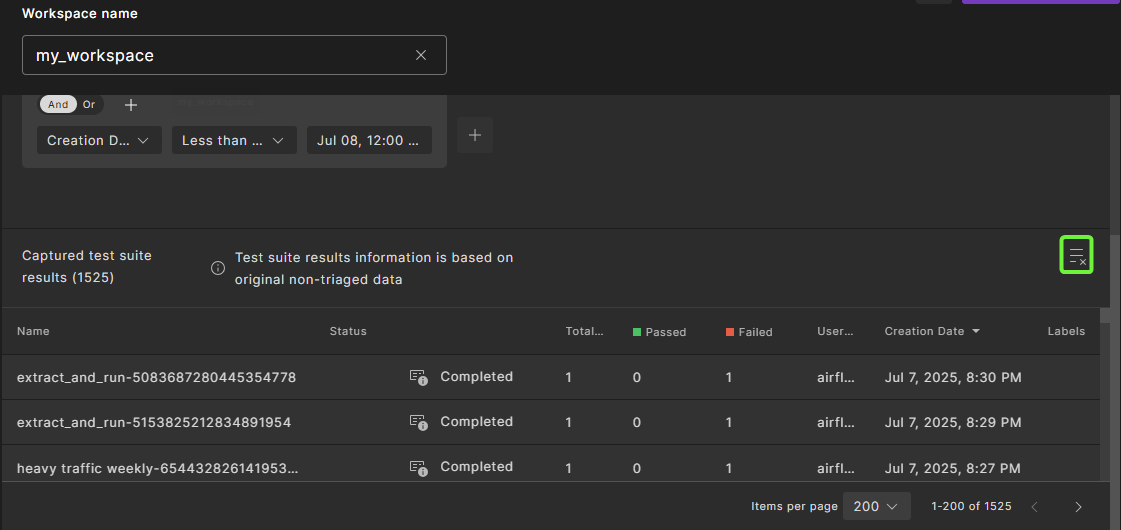
The selected test suite results are removed from the workspace.
-
Click Create Workspace.
The workspace opens displaying the VPlan tab.
49.2 Creating a workspace from existing test suite results
-
In Foretify Manager, select a project to work in:
- If you're on the Select a Project page, click a project.
- If you're in a project, click the Projects dropdown list and select a project.
-
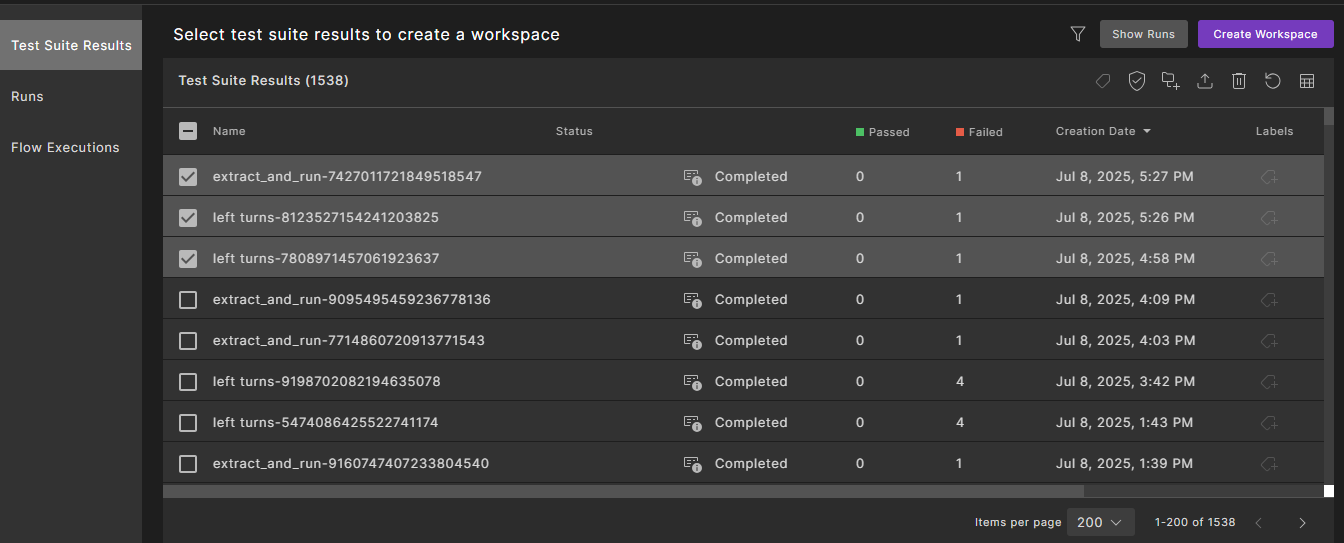
From the project, click Results > Test Suite Results tab to access your test suites.
-
In the Test Suite Results tab, select one or more test suites and click Create Workspace.
-
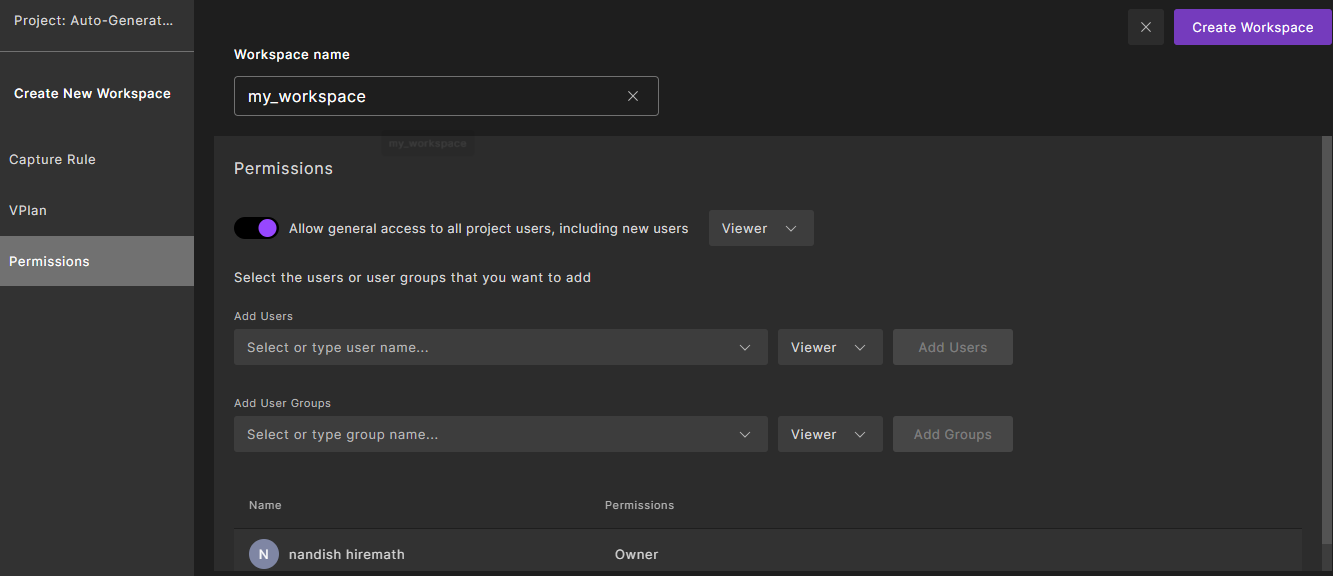
Enter a Workspace name that is unique across your project.
A capture rule preconfigures itself so the rule initially matches those chosen results. You can update the capture rule if necessary.
-
Click Create Workspace.
The test suite results that you selected are included in the workspace.
49.3 Setting workspace user permissions
By default, all project users get Viewer access until you change it. Workspace owners you can specify access for specific users and user groups to Editors or Owners.
-
Select the Permissions sidebar tab

-
Set access:
-
To allow access to all users in your project, toggle Allow general access to all project users, including new users and select the role.
-
Add specific users and user groups and set their roles.
-
-
Click Save.
The following table shows the Foretify Manager workspace roles and their permissions:
| Workspace role | Permissions |
|---|---|
| Viewer |
|
| Editor |
|
| Owner |
|
49.3.1 Finding workspace permissions
-
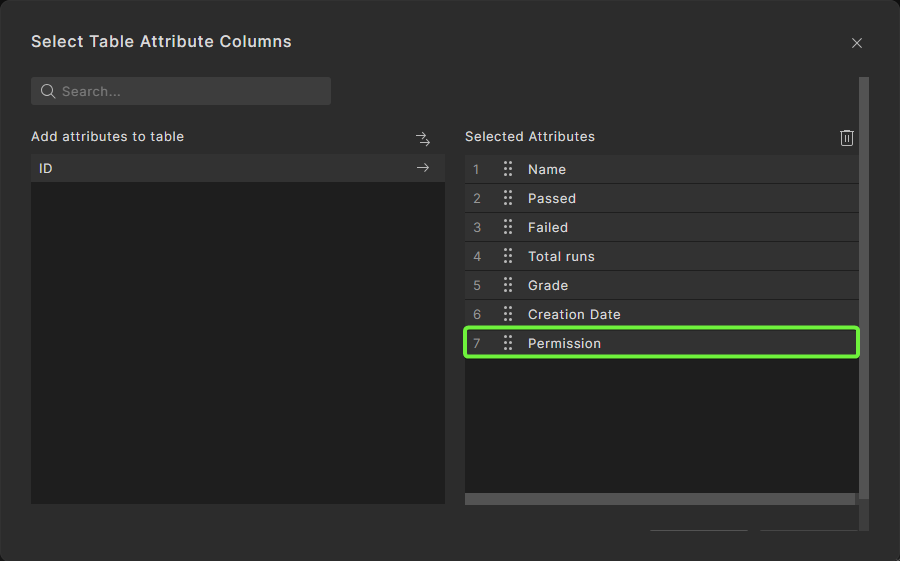
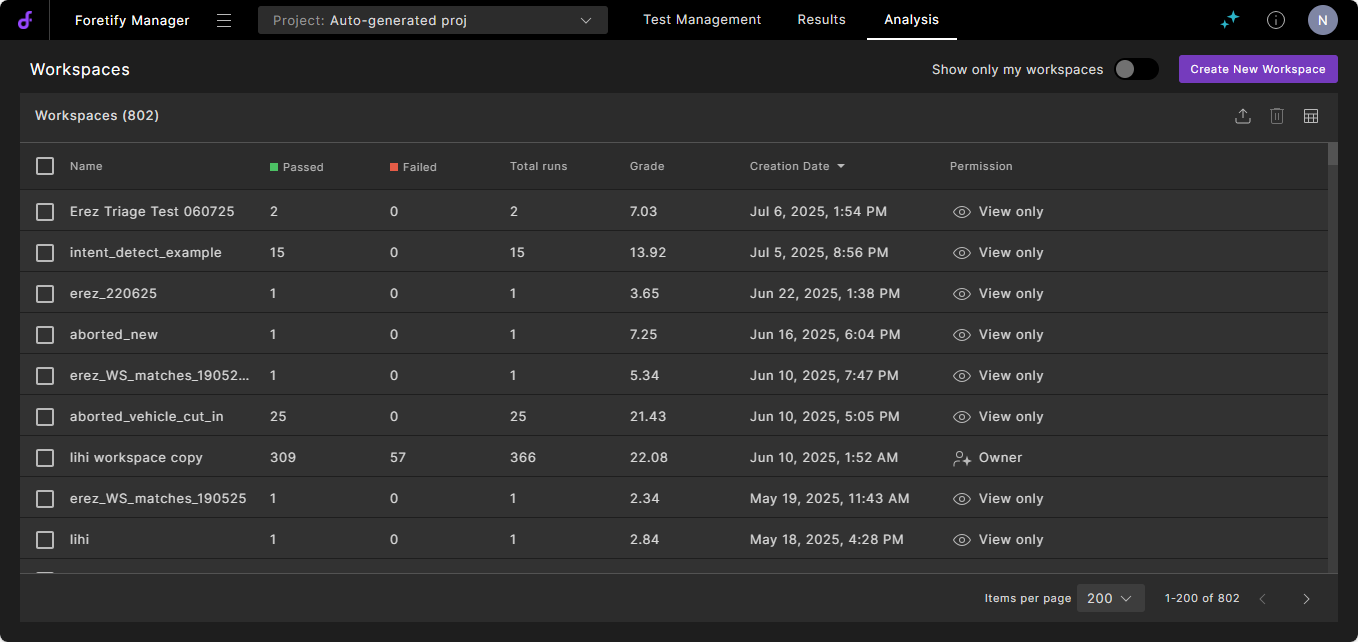
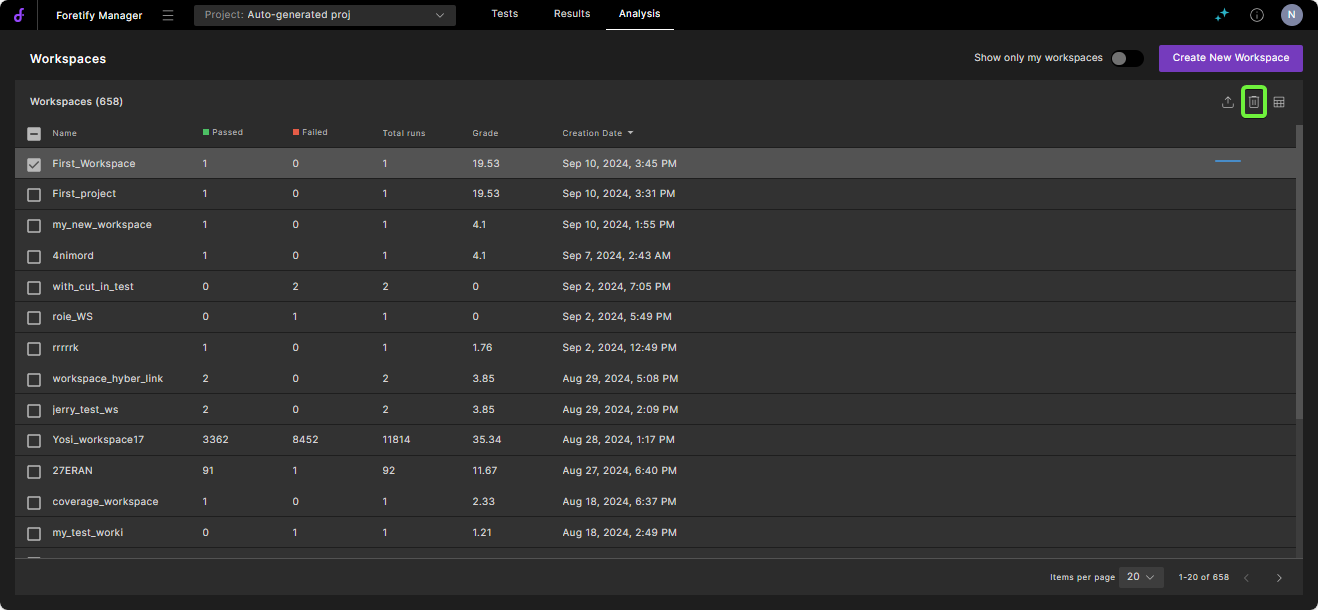
The workspace permissions can be found in the Analysis tab of a project.
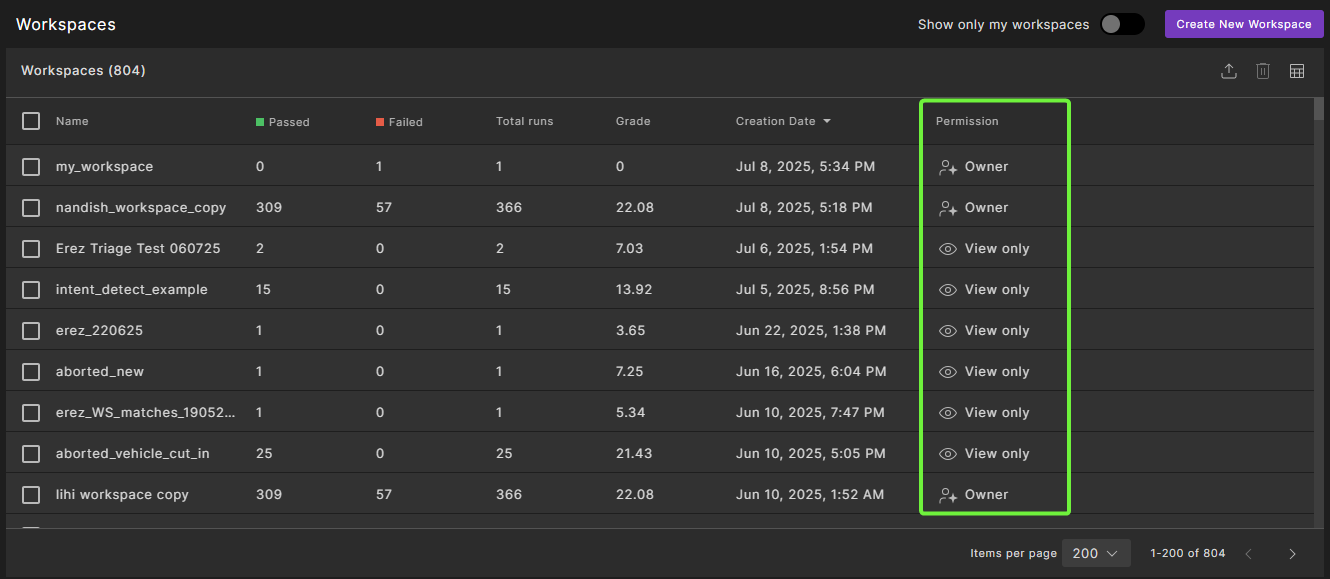
To find your permission level, in the project's main page add the permission column from the column chooser as shown in the following image.
Note
Click Show only my workspaces to filter and view only the workspaces you have created.
-
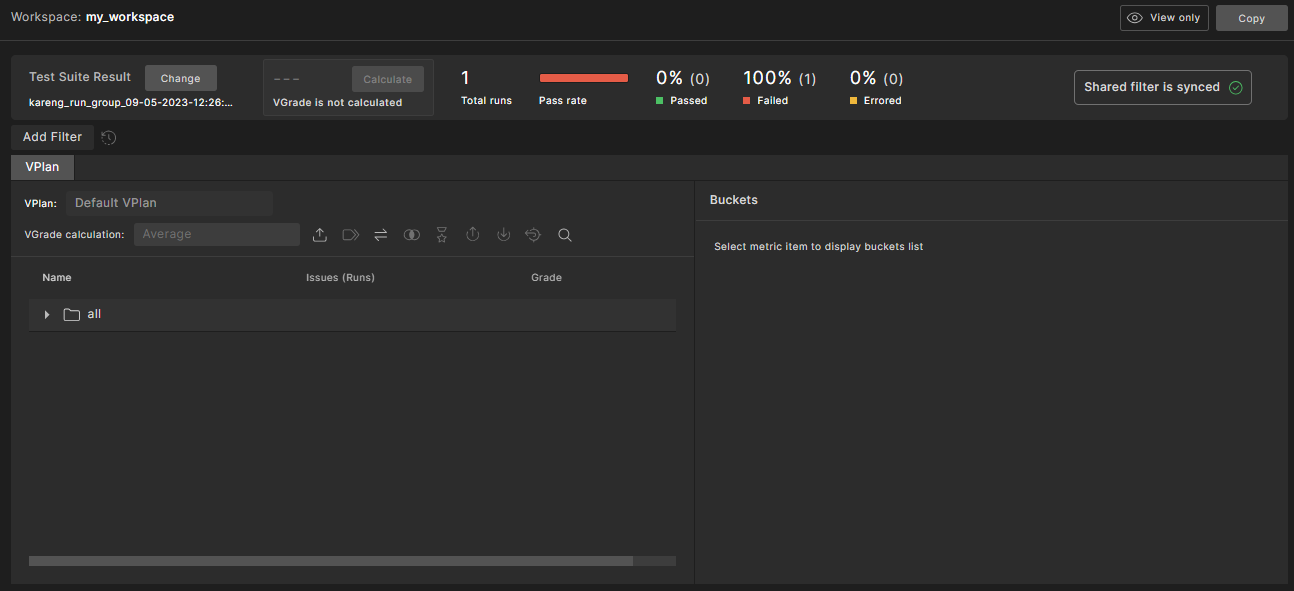
The workspace permission can be found inside a workspace in the top right of the page.

Hover over the permission to display the tooltip with valid operations for your permission level.

49.4 Open a workspace
To open the Workspace window for a previously created workspace:
-
From a project, click the Analysis tab.
Result: A list of available workspaces are displayed. You can modify the table display.
Note
You might need to select a project to access the Workspaces tab. To do so, click the Projects dropdown list and select a project. Select Go to all to select from all the projects.
-
Click the name of the workspace you want to view.
The commands and buttons that display in the workspace depend upon your permission level.
To get your own workspaces:
-
From a project, click the Analysis tab.
Result: A list of available workspaces are displayed.
-
Click Show only my Workspaces.
Result: Only your workspaces are displayed.

-
Click the name of the workspace you want to view.
49.5 Copy a workspace
Note
You must have Editor permissions to copy of a workspace.
To copy a workspace:
-
From your workspace, click Copy next to the Capture rule.
-
In the Save Workspace As dialog box, enter the new name and click Save.
49.6 Select a workspace test suite to review
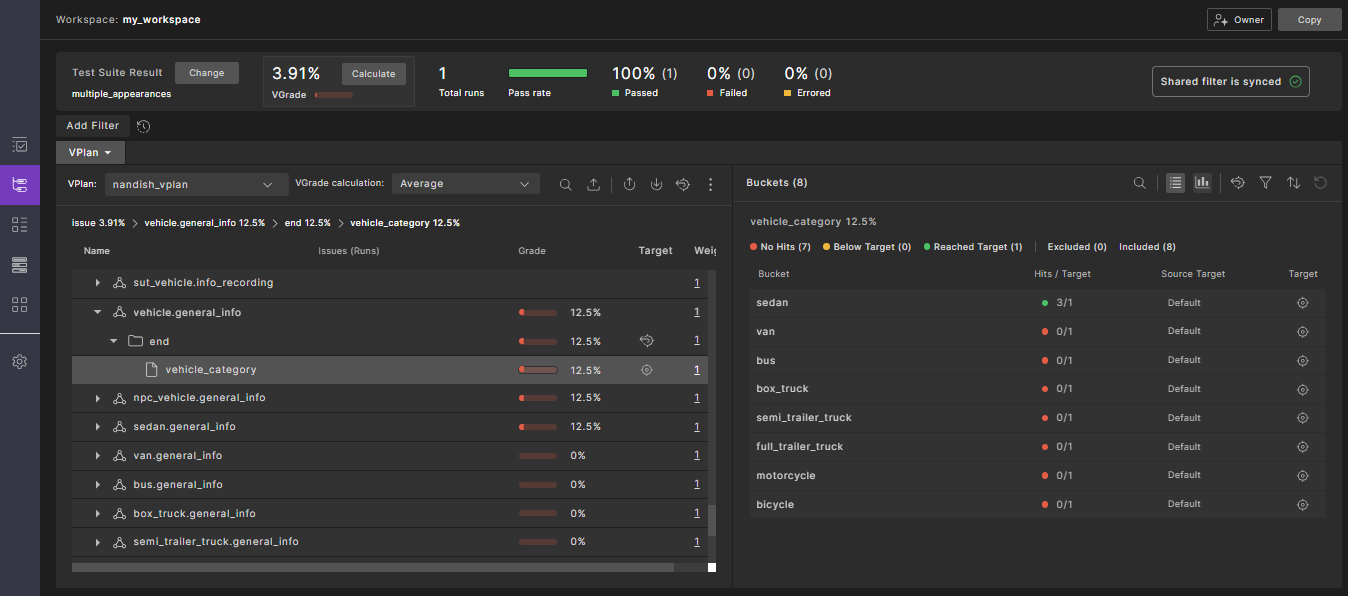
A workspace can capture multiple test suite results. By default, the most recent test suite result calculations are displayed.
To select a test suite to view:
-
Click the dropdown list under Test suite result workspace view.
The Change Test Suite Result dialog displays, containing a list of the test suites in the workspace.
-
Select a test suite or narrow the list first by typing the beginning of the name of the test suite you want to review and then selecting the test suite.
Note
Regular expressions are not allowed.
-
Click Apply.
Note
While you change your test suite result, you can also select the metrics model used to calculate the coverage grade. For details, see how to control the metrics model.
After selecting or modifying a capture rule and saving the workspace settings, the content of the workspaces is modified according to the capture rule. This means it will capture the test suite results that match the capture rule. However, VGrade calculation will not take place for all test suite results automatically. See Calculating VGrade for more information
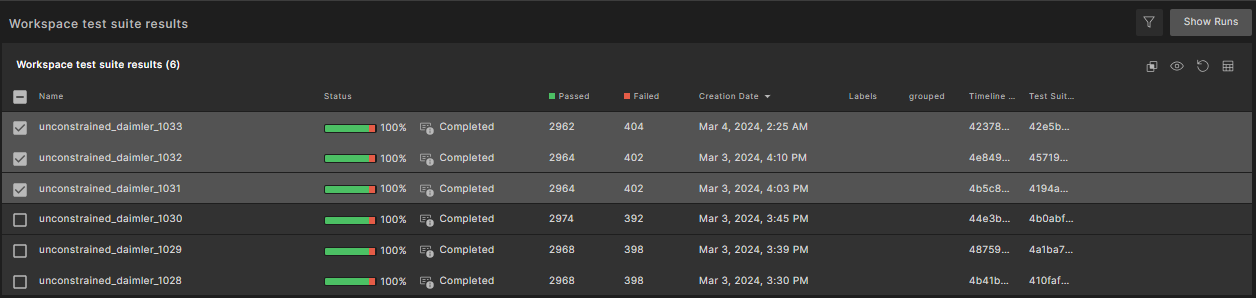
49.7 Group test suite results in a workspace
Sometimes you might want to analyze multiple test results as a single test result. For example, you might want to combine test suite results when one test suite execution is a continuation of another test suite execution that failed to finish. Or you might want to merge multiple test suite configurations that were split out due to using different verification environments. In this case, you might have one test suite per simulator but you want to combine them so that they'll be considered a logical data point in the workspace.
When multiple test suites are grouped together, they can be analyzed as a single test suite, and the vGrade calculation applies to all runs in the grouped test suite.
When you create grouped test suites, other users with access to the workspace see the groups you create.
Note
You can choose to keep or remove the original test suite results that make up a group. Keeping them allows you to compare the grouped test suite results with their original content. This can be useful in some cases, such as comparing the unified coverage of real-world and generative test suite results with the coverage of real-world drives.
Once grouped, the indiviual test suite results in the group are represented as a single test suite result. This enables you to triage and evaluate coverage collectively. Internally, each test suite result (grouped or ungrouped) is represented in the workspace by a timeline point, which references one or more test suite results. Each timeline point is identified by a timeline point ID.
You can view the timeline point ID in the Foretify Manager workspace by clicking the Workspace Test Suite Results icon in the left sidebar and adding the Timeline Point ID column to the table. This ID is used when accessing data through the python SDK or Triage Python Rules (see the -tp parameter).
To group test suite results:
-
Click the test suite results icon in the sidebar.

-
Select the checkboxes of the test suites you want to group.
-
Click the Group icon in the upper right.

-
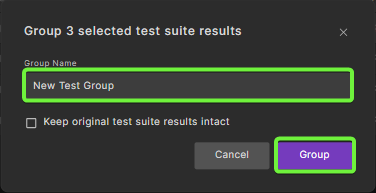
Enter a name for the group and click Group.
-
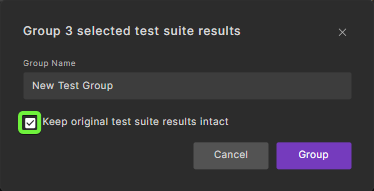
To keep the original test suite results after grouping, check the 'Keep original test suite results intact' checkbox.
A new test suite result is created.
Note
The Creation Date assigned to the group is determined by whichever Test Suite Result you selected first.
To ungroup a group of test suites results:
-
In the row of the test suite group, select the Grouped icon.

-
If original test suite results were not kept:
-
In the Test suite result group info dialog box, click Ungroup.
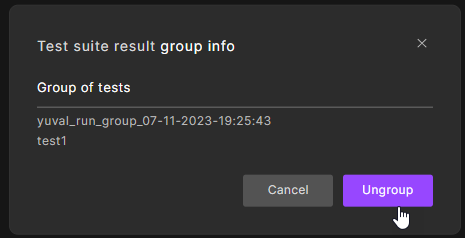
The test suites that comprise the group display individually. Note that if you are ungrouping a group of groups, the original groups display.
-
-
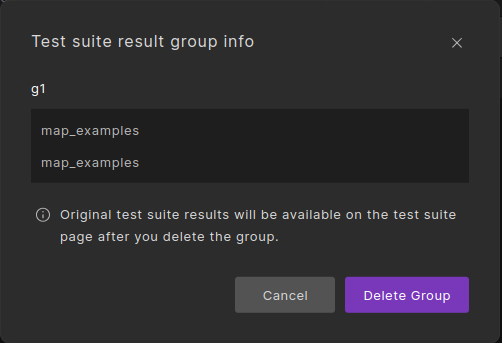
If the original test suite results were kept:
-
In the Test suite result info dialog box, click Delete Group.
-
The group will be deleted and original test suite results are preserved.
-
49.8 Delete a workspace
Note
Only users with Owner permissions can delete a workspace.
To delete a workspace:
-
From a project, click the Workspaces tab.
A list of available workspaces displays.
-
Select one or more workspaces that you want to delete and click the Trash icon at the top right of the window.
You can also delete a workspace by selecting the Settings (gear) icon in the left sidebar, then clicking Delete Workspace and confirming the dialog box that appears.
49.9 Updating the capture rule for a workspace
Workspace owners can modify the capture rule to define which test suites are included in the workspace.
Warning
Changing the capture rule affects both existing and future test suites, and may result in some results being removed.
To update the capture rule for a workspace:
- From your workspace, select the Settings (gear) icon in the left sidebar.
- Select the Capture Rule tab.
- Change the settings in the rules and click Show Results to update the captured test suite results.
- To explicitly remove test suite results, click the Remove Test Suite Results from this Workspace icon below the Capture rule section on the right, select one or more test suite results, and click Apply.
- Click Save.