34. Filtering and other shared features
The Test Suite Results, Runs, and Workspace tabs share common features.
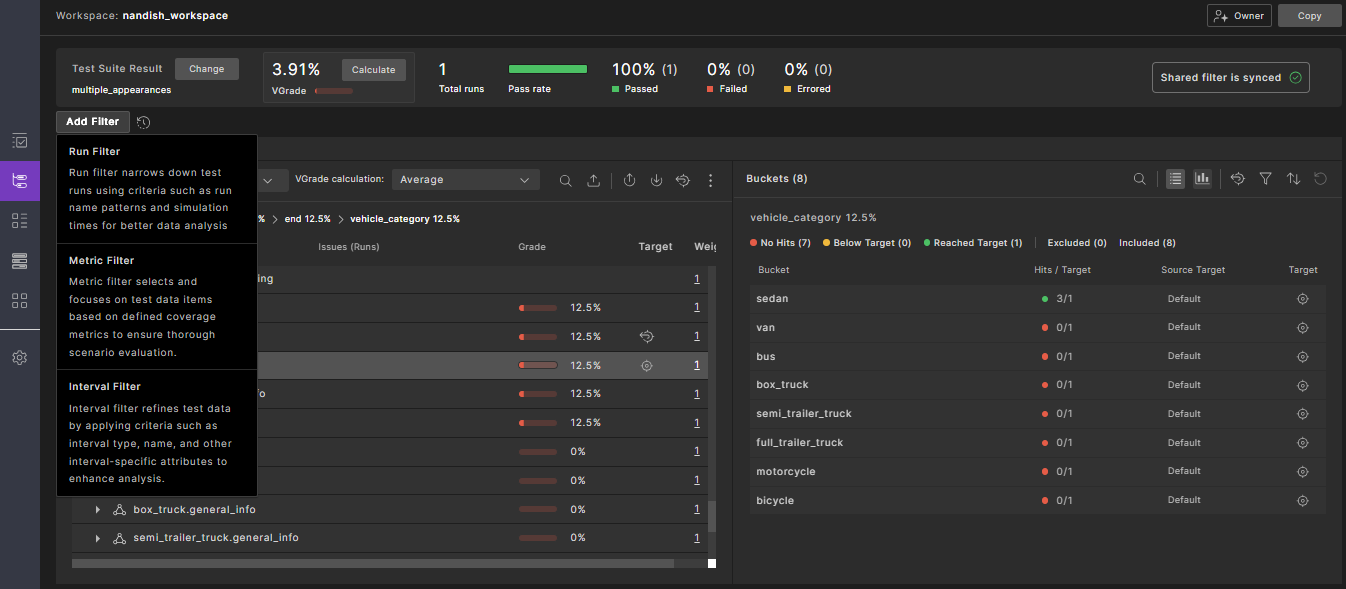
34.1 Create filters
Foretify Manager provides filtering options that help you narrow down large result sets and focus on specific runs or metric items that match your current analysis needs. To apply these filters, click the Show Filters icon in the VPlan, Runs, Intervals, and Test Suite Results tabs, and then define your filter conditions to display only the relevant data.
- The VPlan, Runs, and Intervals tabs support filtering of runs, metrics and intervals.
- The Test Suite Results tab supports run filters only.
You can add a filter by clicking Add Filter. For details, see Creating and publishing filters in workspaces and Modify filters and tags.
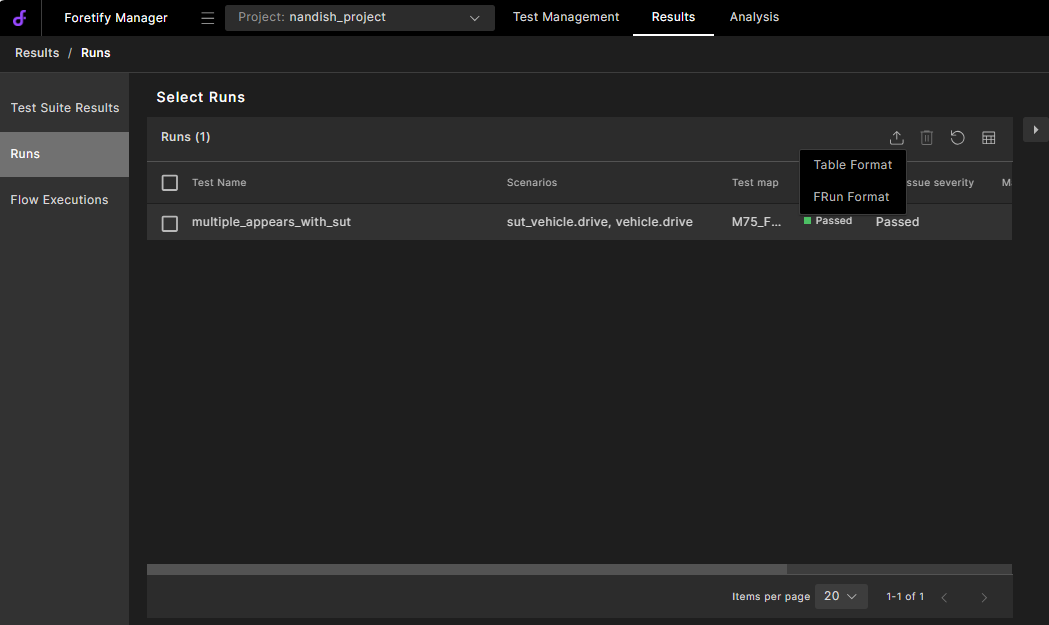
34.2 Export to Table or FRun format
You can export data from the Test Suite Results, Runs, and Workspace tables.
- Export tables to CSV for reporting.
- Export tables to FRun CSV format to rerun data with FRun. Runs can only be exported to FRun format.
To export, click the Export ![]() (download) icon. You can export all rows or selected rows.
(download) icon. You can export all rows or selected rows.
34.3 Modify table display
You can customize table views in the Test Suite Results, Runs, and Workspace tabs:
- Sort columns in ascending or descending order.
- Select visible columns using the Column Selection
 icon. See how to select columns to display in a table.
 - Delete entities you created using the Trash
 icon.
icon. - Undo the last action using the Undo icon.
- Navigate pages using pagination controls.
- Adjust rows per page using the Items per page dropdown.
34.3.1 Select columns to display in a table
The following examples show how to add attribute and metric item columns to the Triage Runs table. Selecting columns for other tables works similarly.
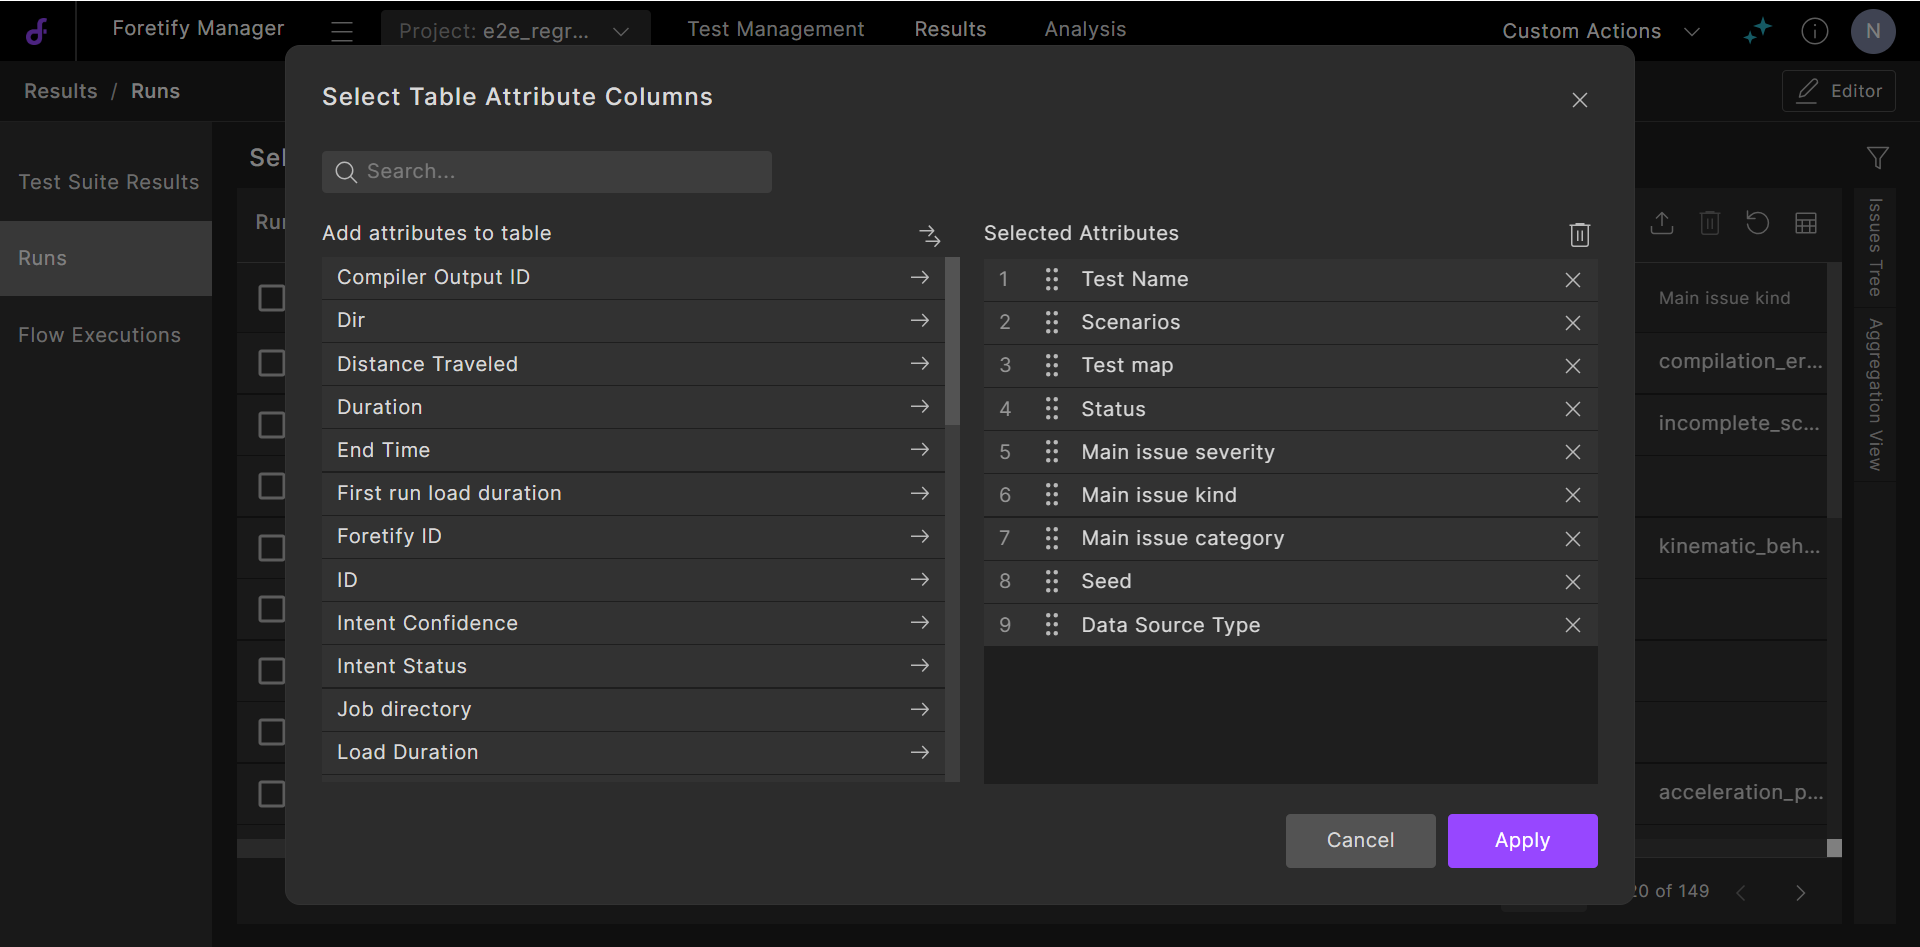
34.3.1.1 Display attributes as table columns
You can add attributes as columns in tables.
To select attributes to display as table columns:
-
On the top right of the Triage Runs table, click the Column Selection
icon. -
On the Attributes tab, use the search box or scroll down to find specific attributes.
-
Click the arrow for an item to add it to the list of selected items.
The item is added to the bottom of the list and appears as the rightmost column.
-
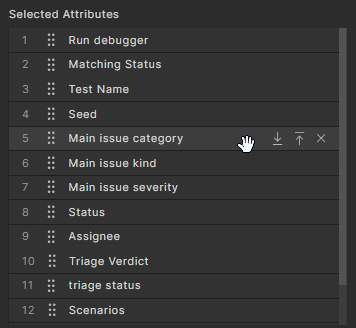
In the selected list on the right, use the handles to drag and drop items to rearrange them.
-
Hover over an item in the list on the right to access the display icons:
- Click
 to move the item to the bottom of the list.
 -
Click
 to move the item to the top of the list.
Note
In the Triage Runs table, the Run debugger column is always at the top of the list, so the item becomes second in the list.
-
Click ✕ to remove the item from the list. The item moves back to the available list on the left.
- Click
-
Click Apply to accept the changes, or Cancel to dismiss them.
The attributes you add appear as columns in the Triage Runs table view.
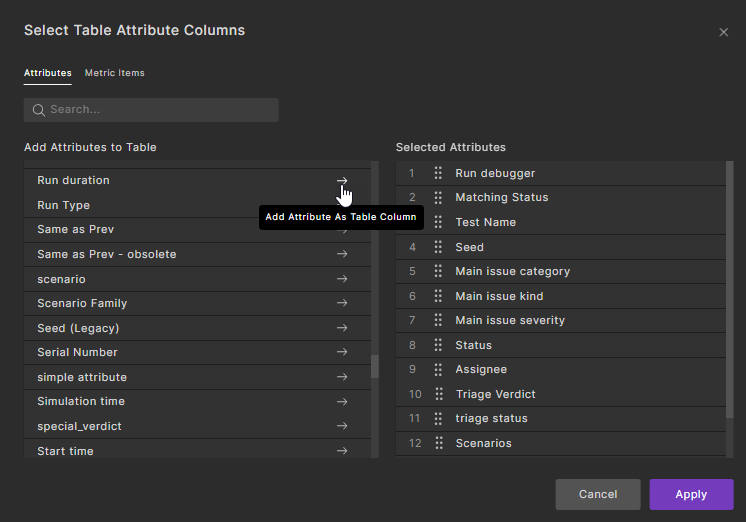
34.3.1.2 Display metric items as table columns
You can add metric items as columns in the Triage Runs table. Currently, you cannot add metric items to the Workspace Runs table.
To display metric items as table columns:
-
On the top right of the Triage Runs table, click the Column Selection
icon. -
Select the Metric Items tab.
Metric items are organized by scenarios, events, and metric items, in the same way they are organized in the VPlan view.
-
Use the search box or navigate through the metric item's tree to find specific metric items.
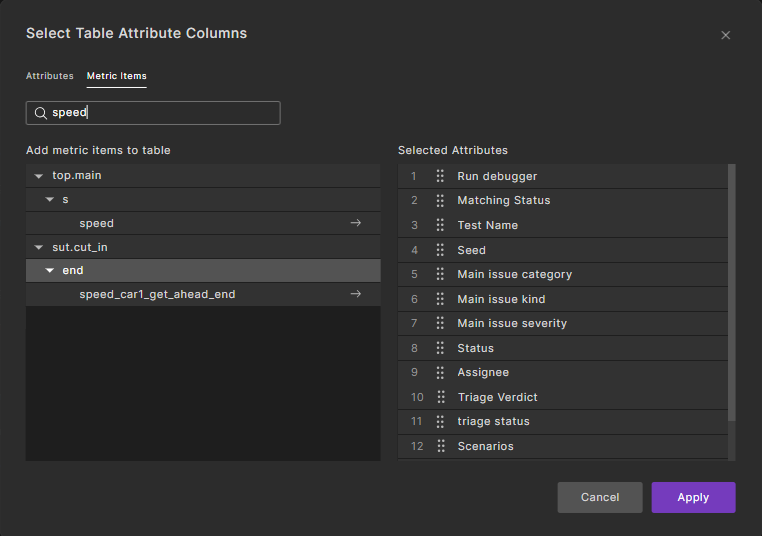
-
Click the arrow for an item to add it to the list of selected items.
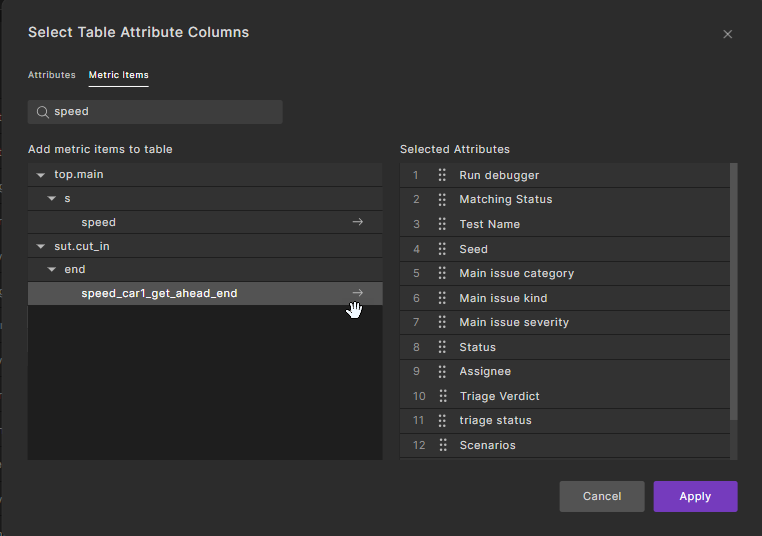
The item is added to the bottom of the list and appears as the rightmost column.
-
In the selected list on the right, use the handles to drag and drop items to rearrange them.
-
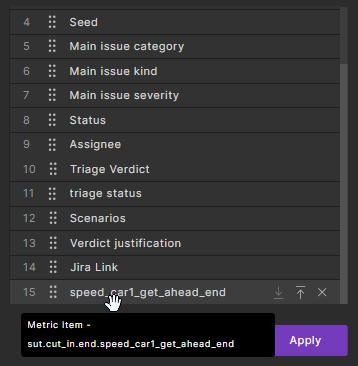
Hover over a metric item in the list on the right to view the full path to the metric item and to access the display icons:
- Click to move the item to the bottom of the list.
-
Click
to move the item to the top of the list.Note
In the Triage Runs table, the Run debugger column is always at the top of the list, so the item becomes second in the list.
-
Click ✕ to remove the item from the list. The item moves back to the available list on the left.
- Click
-
Click Apply to accept the changes, or Cancel to dismiss them.
The metric items you add appear as columns in the Triage Runs table view.
34.4 Copying an item
If you hover the cursor over an item and see two Copy icons, you can copy the path of an item or the URL of an item.

34.5 Navigating to an item by URL
To share information with a team member, you can copy and send a URL by email for any item that has an ID. When opened in a browser, the link displays the view of the test suite data as it was filtered when the link was taken. If test suite data is added or deleted, the modifications appear in the link view. However, the filters remain stable, unless modified by the receiver of the link.
For example, you can share a URL containing a Run ID, such as http://<server-address>/testRun/<run-id>.
Note
When you open a shared link, Foretify Manager checks out a license.
34.6 Opening multiple Foretify Manager tabs in the browser
To open a page in separate tab, use the standard keyboard sequence for that browser. For Chrome, for example, hold down the Ctrl key and press the link that opens the page. The current page stays active, and the new page opens in a separate tab.
34.7 Understanding session expiration
A Foretify Manager session expires after ~12 hours, and all open Foretify Manager browser tabs are redirected to the Foretify Manager login page.
If you then log in from one of the tabs, all other tabs automatically return to their previous state.
34.8 Recovering deleted data
It is possible to restore some Foretify Manager entities up to 30 days after they were deleted. After 30 days, these entities are permanently removed from the database.
These entities include Projects, Workspaces, Test Suites, and their included Test Runs.
If you need to restore deleted data, contact Foretellix.