51. Workspace intervals
51.1 Display and filter intervals in the Workspace
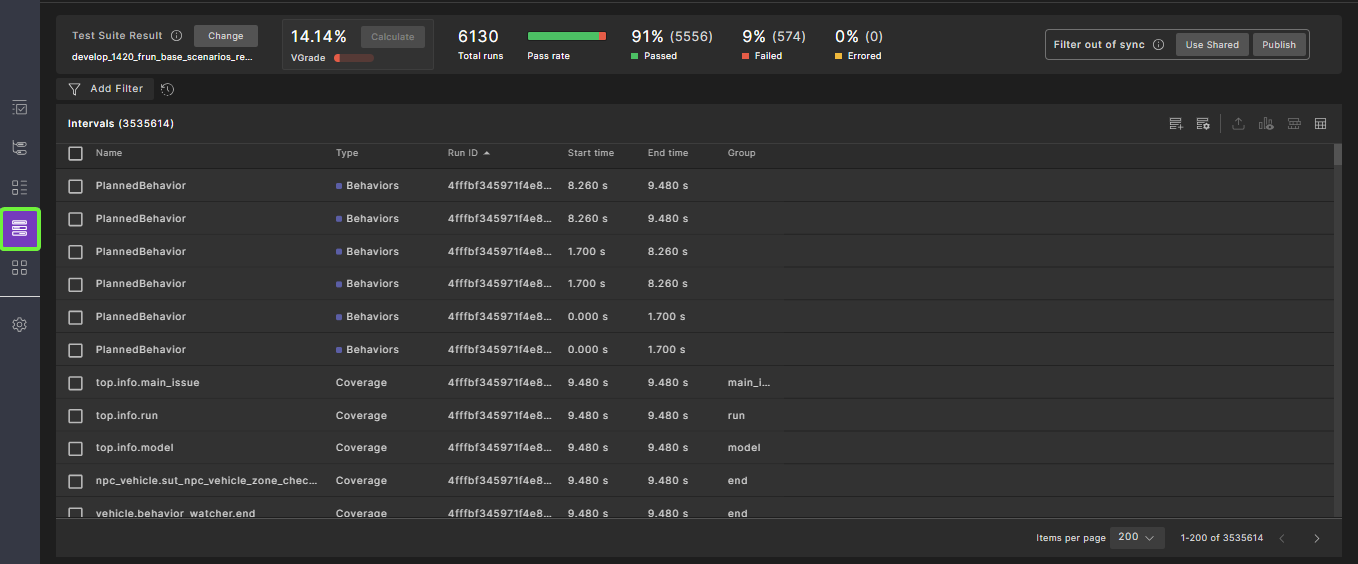
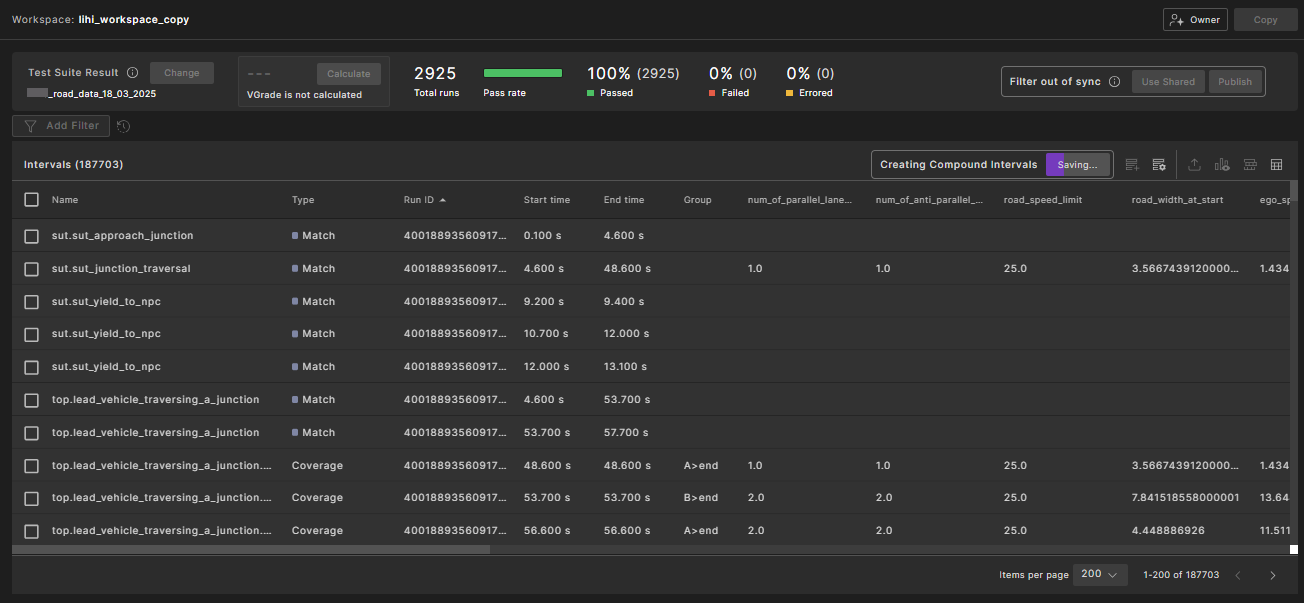
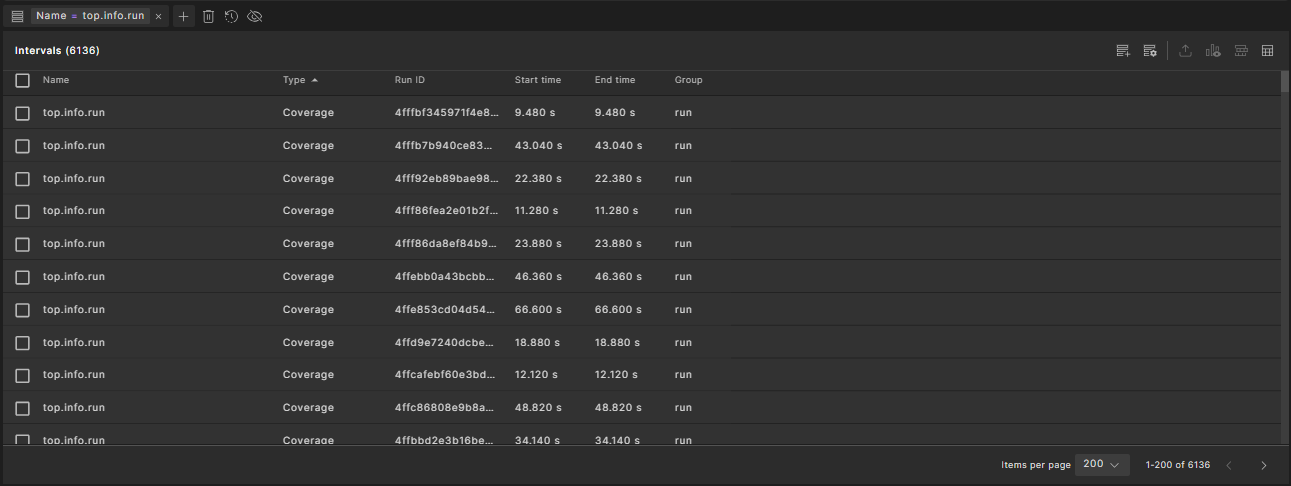
Use the Intervals tab of the Workspace to browse and filter all intervals for the active Workspace test suite results.

To access the Intervals tab, select the Intervals icon on the left sidebar:
![]()
By default, the following interval attributes are shown:
-
Interval name
-
Interval type
-
Run ID, identifying the run in which this interval was emitted
-
Start time
-
End time
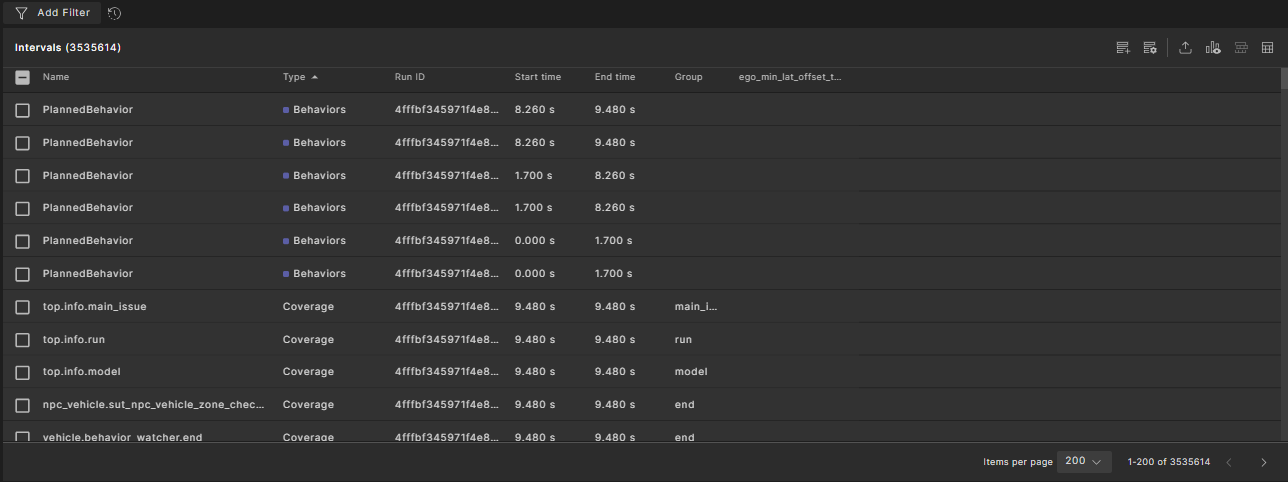
You can add more interval attributes from the table column chooser on the top right. See Modify table display. Note that some interval attributes are relevant to certain interval types.
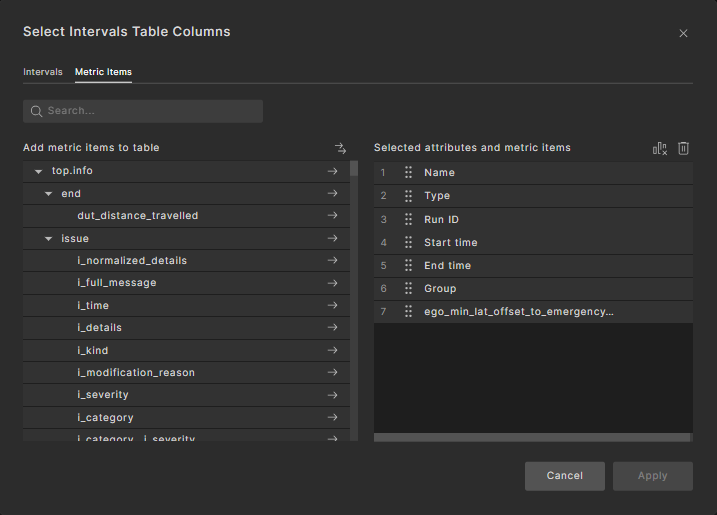
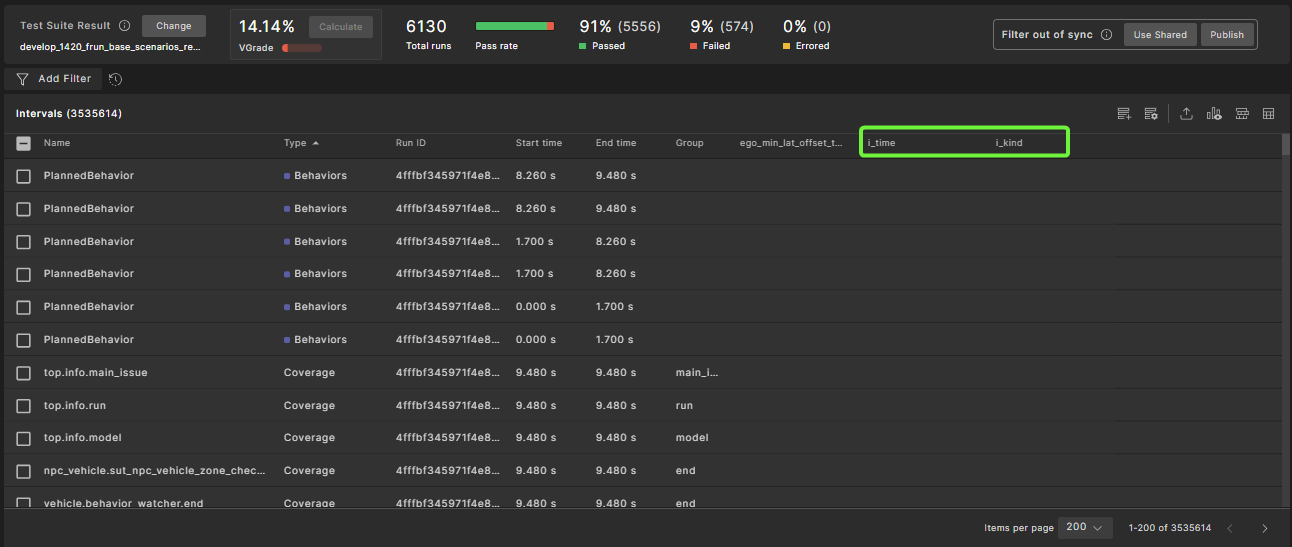
You can add metric items from the column chooser to see metric items that were collected under specific intervals. Note that metric items that were not collected under an interval will show an empty value for that interval.
The Attribute descriptions are provided in the following table:
| Attribute Display Name | Description | Type | Unit |
|---|---|---|---|
| Actor | Foretify actor ID that produced this interval | Number | |
| Type | Type of interval. The available types are: - Scenario: Represents a scenario - Coverage: Represents a group of metric items emitted for a specific event - Match: A scenario matched by the Evaluation Pipeline - Anomaly: An anomaly matched by the Evaluation Pipeline - Watcher: A watcher instance emitted - Global Modifier: A global modifier scenario - Behavior: A behavior scenario emitted by Foretellix Driver |
Enum | |
| Name | Interval name. Watchers: The name of the parent interval (scenario or global modifier) on which the watcher was emitted Scenario, Match, Anomaly, Global Modifier: The name of the scenario Coverage: Full path to the coverage group name, in the format of <struct>.<group>. For example, "sut.lead_vehicle_changing_speed_with_lateral_swirl.start" |
String | |
| Label | Scenarios, Match, Anomaly, Global Modifier: The label of the scenario in OSC. For example, ‘ego_drive: vehicle.drive()’ Watchers: Full path to the interval. For example, for a watcher interval called ‘w_speed’ emitted from a global modifier called ‘gm’ under actor ‘top.sut’, the label will be ‘top.sut.gm.w_speed’ Coverage: Not used |
String | |
| Struct | OSC struct name for coverage intervals only. Coverage: The name of the struct on which the coverage interval is collected |
String | |
| Group | Coverage group name, typically corresponding to the OSC event name on which the metric item is emitted. For coverage intervals only. | String | |
| Start time | Start time of the interval relative to the run | Float | Seconds |
| End time | End time of the interval relative to the run | Float | Seconds |
| Duration | Duration of the interval | Float | Seconds |
| Run ID | Unique identifier of the run on which the interval was emitted | String | |
| Watcher type | Relevant only to Watcher type. Can be either ‘Watcher’ or ‘Checker’. Checkers are watchers that emit an issue |
Enum | |
| Watcher name | Relevant only to Watcher type. The name of the watcher variable as defined in OSC, for example, watcher <watcher name> is <struct> |
Enum | |
| Issue ID | For watchers of checker type only, the ID of the issue in the issue's table for that run | Number | |
| ID | Interval ID | Number | |
| Issue Category | This attribute will appear for a checker watcher that references an issue. For more information, see here | String | |
| Issue Message | This attribute will appear for a checker watcher that references an issue. For more information, see here | String | |
| Issue Details | This attribute will appear for a checker watcher that references an issue. For more information, see here | String | |
| Issue Kind | This attribute will appear for a checker watcher that references an issue. For more information, see here | String | |
| Issue Normalized Details | This attribute will appear for a checker watcher that references an issue. For more information, see here | String | |
| Issue Result | This attribute will appear for a checker watcher that references an issue. For more information, see here | String | |
| Issue Severity | This attribute will appear for a checker watcher that references an issue. For more information, see here | Enum | |
| Issue Time | Point in time (within the containing run) when the issue occurred. This attribute will appear for a checker watcher that references an issue |
51.1.1 Filter using intervals
Filtering the Intervals tab is essential as there will be a large number of intervals in a typical test suite results. Filtering can help identify interesting test behaviors on a larger scale, before starting to evaluate individual runs.
The Intervals tab is filtered by the Workspace filter. You can use the following filter types:
-
Run filter – Filters intervals that belong to runs matching the selected criteria. See Creating a Run filter.
-
Metric filter – Filters intervals containing specific metric items. See Creating a Metric filter.
-
Interval filter – Filters intervals based on their properties or collected metric items. See Creating an Interval filter.
For details on creating filters, see Creating and publishing filters in your workspace.
51.1.2 Debug an interval
Click an interval in the Intervals tab to open the run in the single-run debugger. The debugger displays with the interval selected.
To open the single-run debugger, you can perform either of the following actions:
- Click the middle mouse button.
- Click right mouse button > Open link in a new tab.
- Click 'crtl' + left mouse button.
Any interval text fields are clickable.
51.2 Compound intervals
Use compound intervals to create new intervals by combining overlapping intervals within a Workspace. These intervals facilitate more complex time-based queries, such as finding all lead vehicle scenarios that occur while traversing a junction.
The key functions of compound intervals are:
- Temporal querying: Filter and search for overlapping intervals by using various time-based conditions (e.g., overlaps, during, before).
- Creation of compound intervals: Save the results of temporal queries as new intervals that incorporate attributes from the source intervals and reflect their overlapping time span.
- Advanced filtering and queries: Combine multiple types of queries and filters to isolate specific interval behaviors, including timestamp-specific and duration-based conditions.
- Automation support: Manage interval rules and automate processing using the Python SDK.
- Visualization: Highlight user-created compound intervals in the single-run debugger to clearly represent overlaps.
51.2.1 Creating compound intervals
To create compound intervals:
-
From the Workspace, click the Intervals tab in the left navigation bar.
-
Click the Create New Compound Intervals icon.
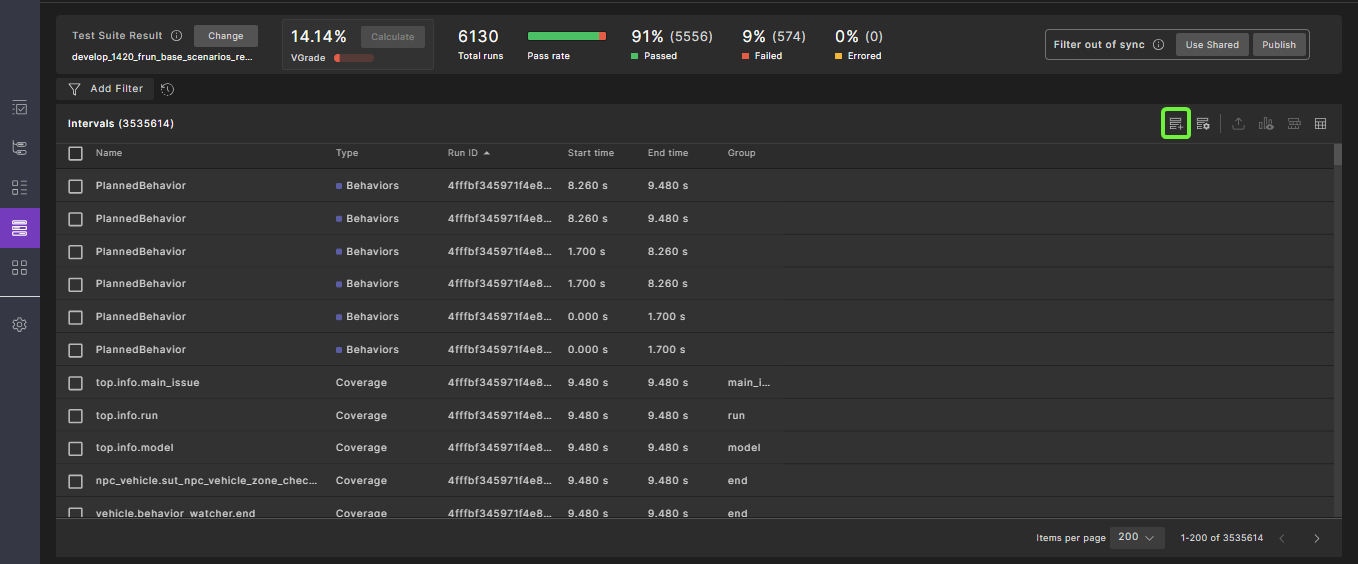
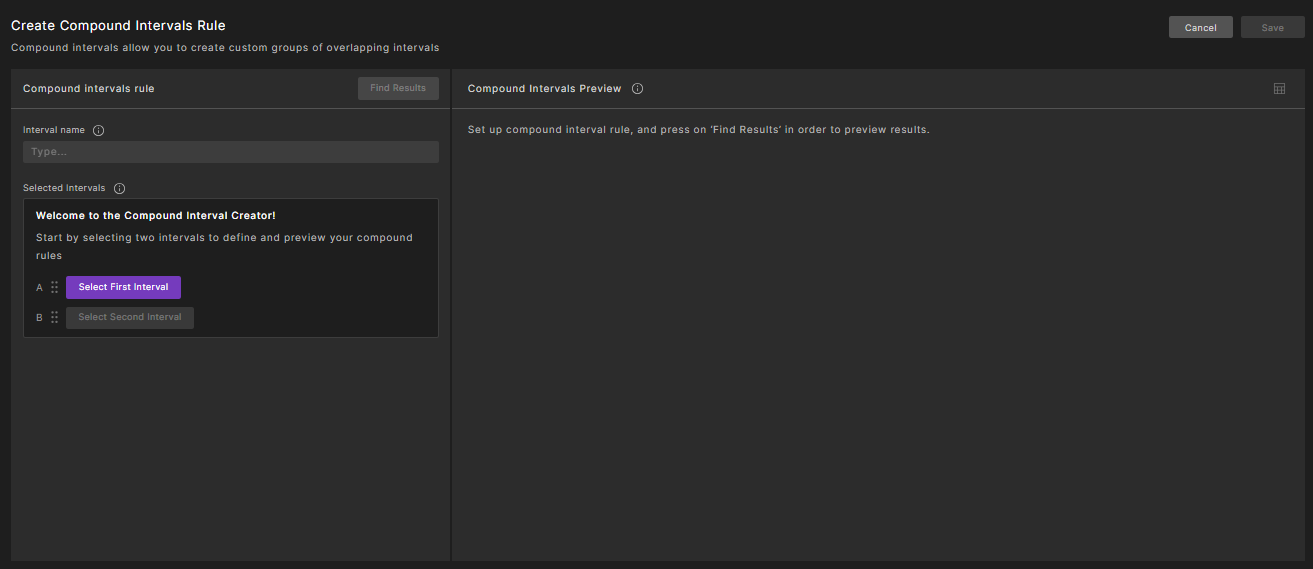
Result: The Create Compound Intervals Rule tab is displayed.
-
In the Create Compound Intervals Rule tab, perform the following actions:
a. Provide the required name in the Interval name field.
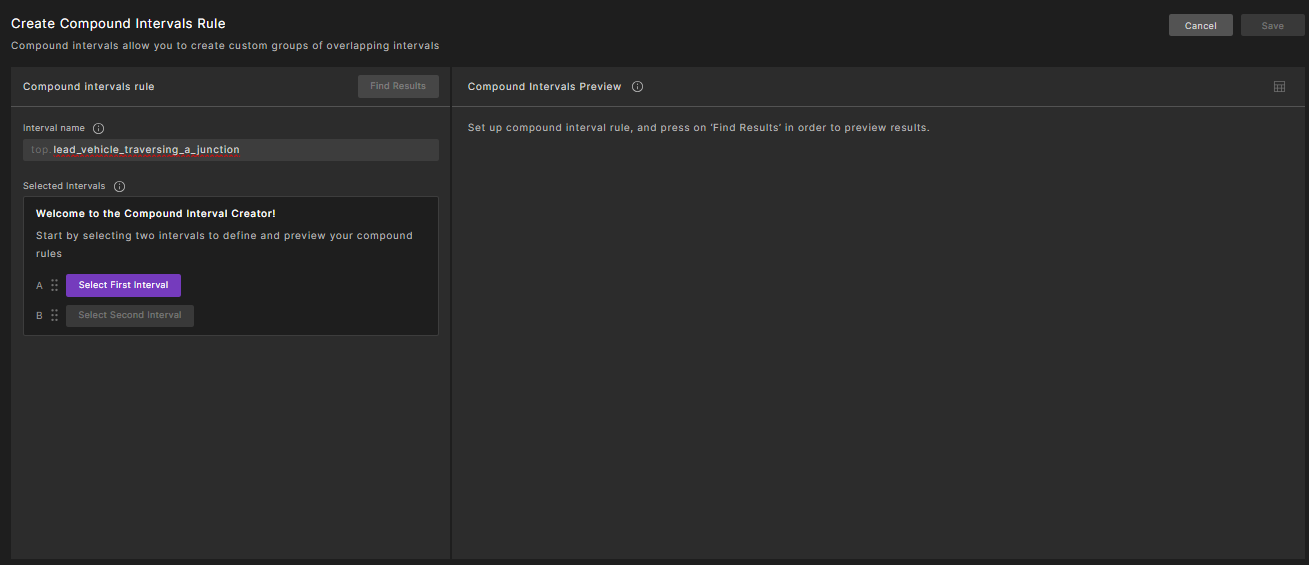
b. Select the required intervals. You can also add primary and child conditions to the selected intervals.
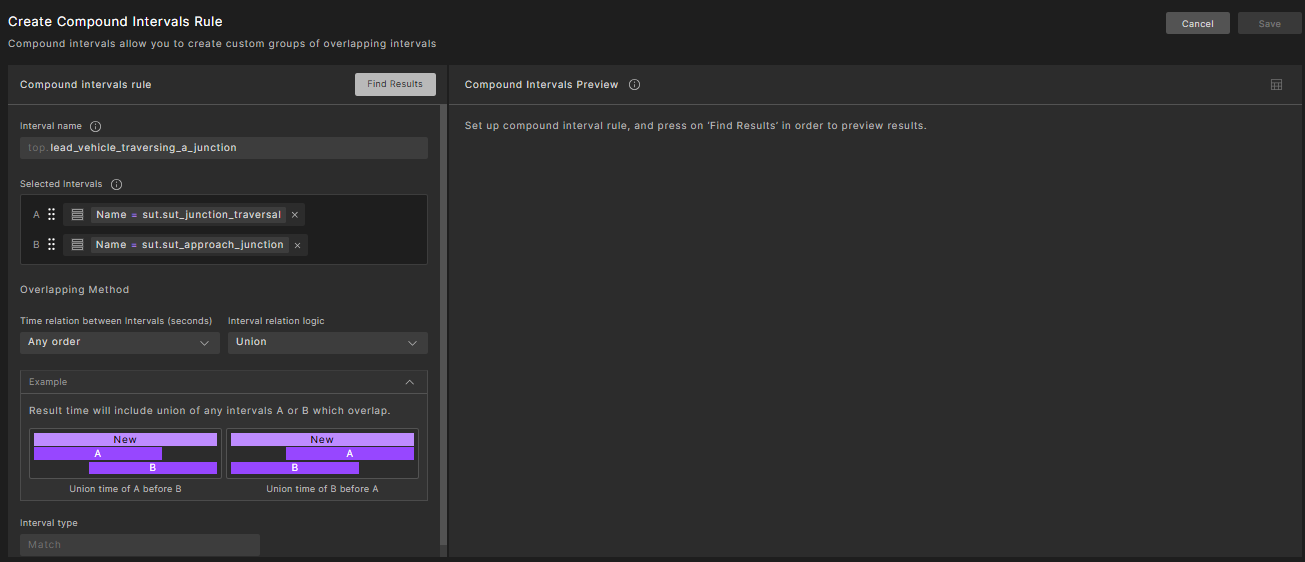
c. Select the time relation between intervals, and the interval relation logic.
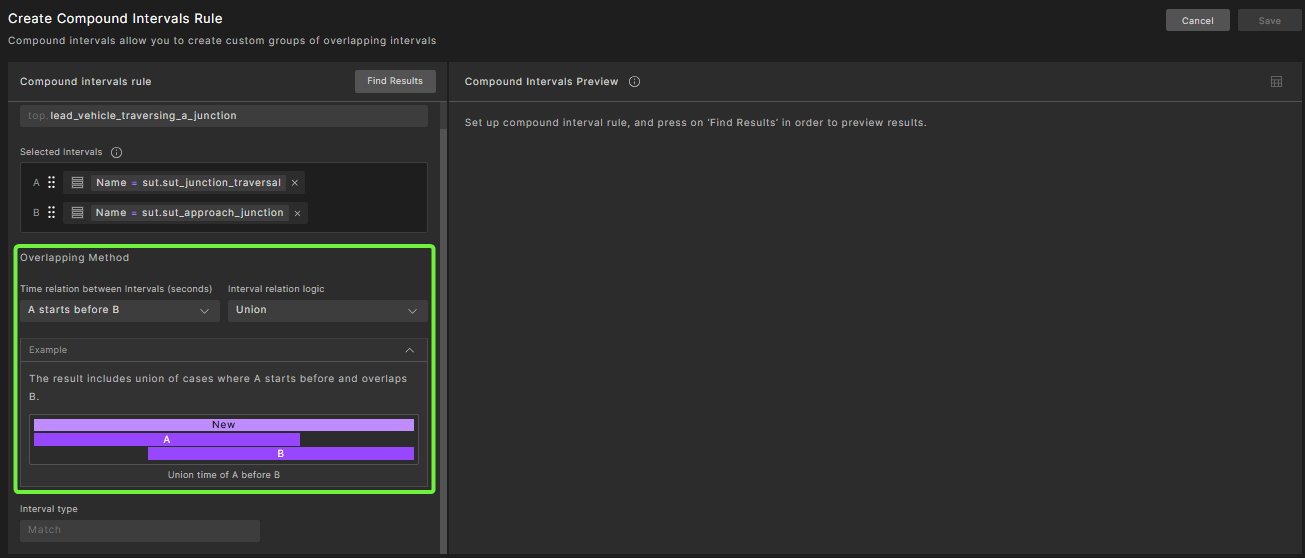
For more details on how compound-intervals are formed from different interval types, see Type relationship tables of compound intervals.
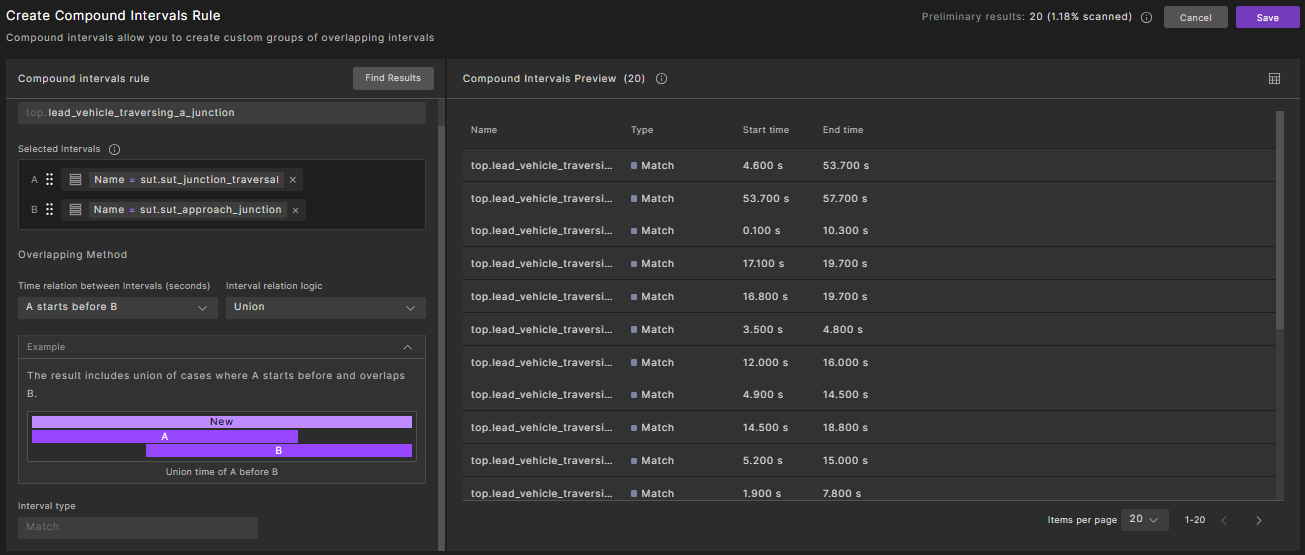
d. Click Find Results.
Result: Up to 20 compound intervals are displayed in the Compound Intervals Preview section with the scanned portion estimation.
-
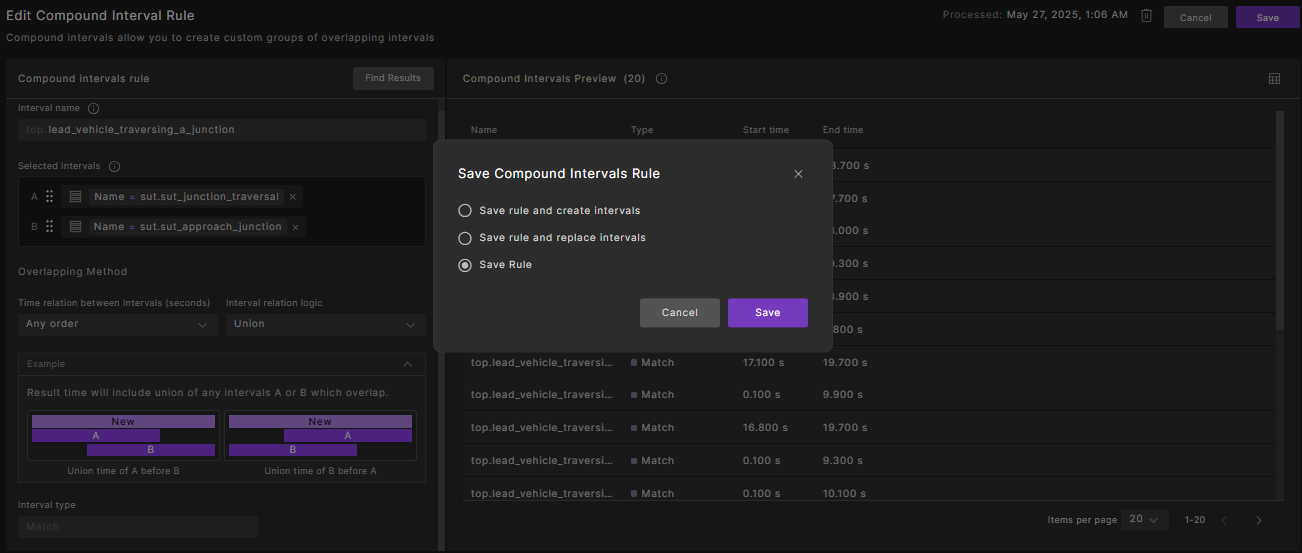
Click Save.
Optionally, select the Save intervals in test suite results checkbox to save the intervals in the test suite results (TSR).
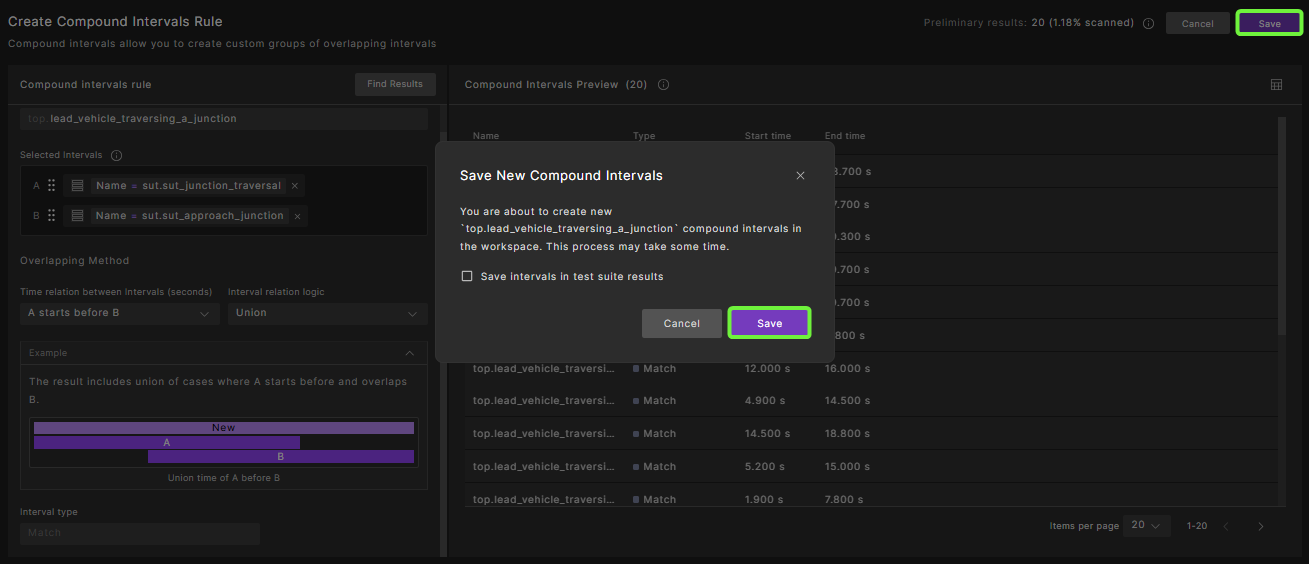
Result: You are redirected to the Intervals tab, where a progress bar appears with the status Creating Compound Intervals.
Note
The compound interval creation process might take some time, depending on the Workspace size and the number of intervals to inspect and create.
51.2.2 Compound interval rules
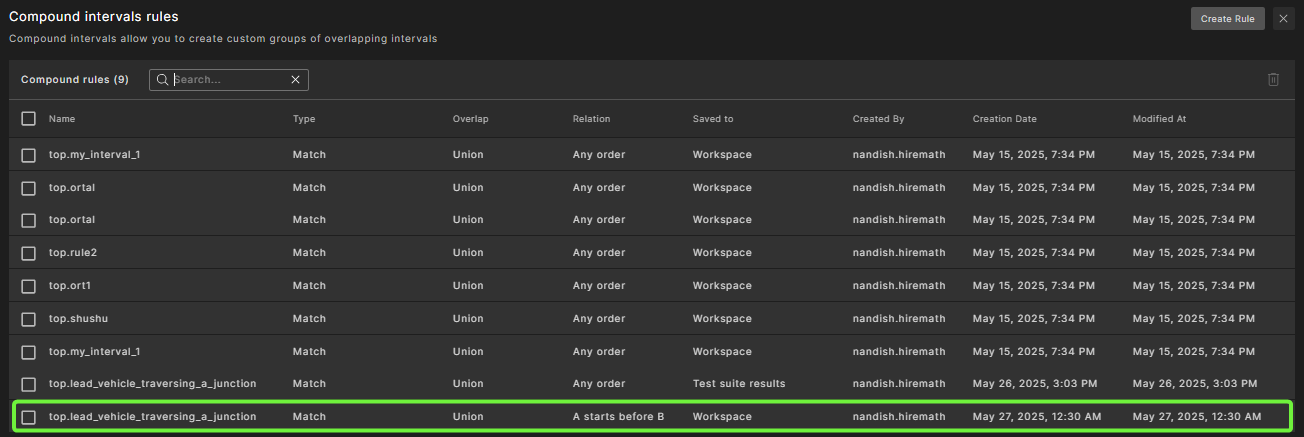
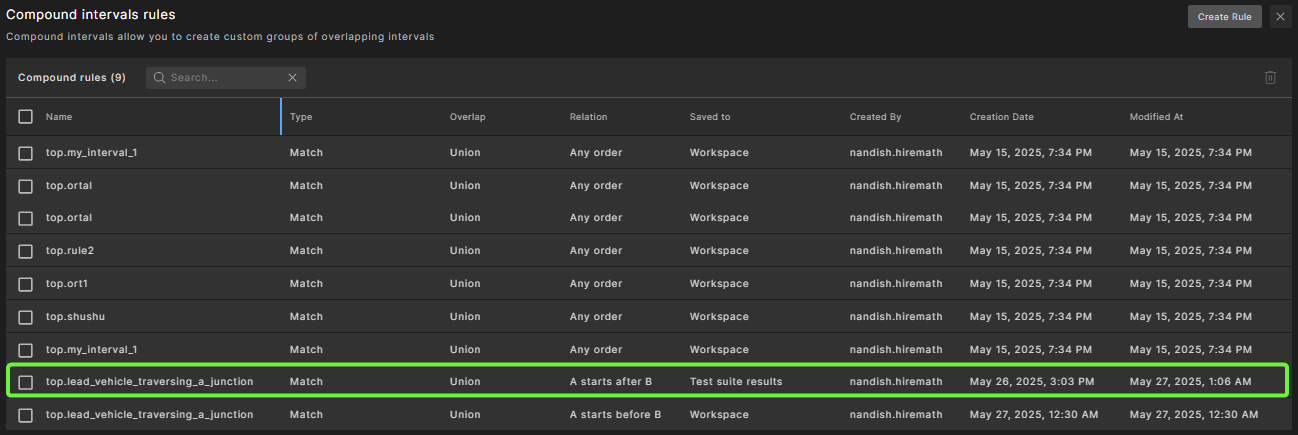
After a compound interval is created, click the Compound intervals rules icon.
![]()
The created compound rule is displayed in the Compound Interval Rules tab.
51.2.2.1 Edit a compound interval rule
Note
You must have Editor or Owner permissions to edit a compound rule.
-
From the Compound intervals rules tab, click the required rule.
-
Edit the required fields.
-
Select the save option, and then click Save.
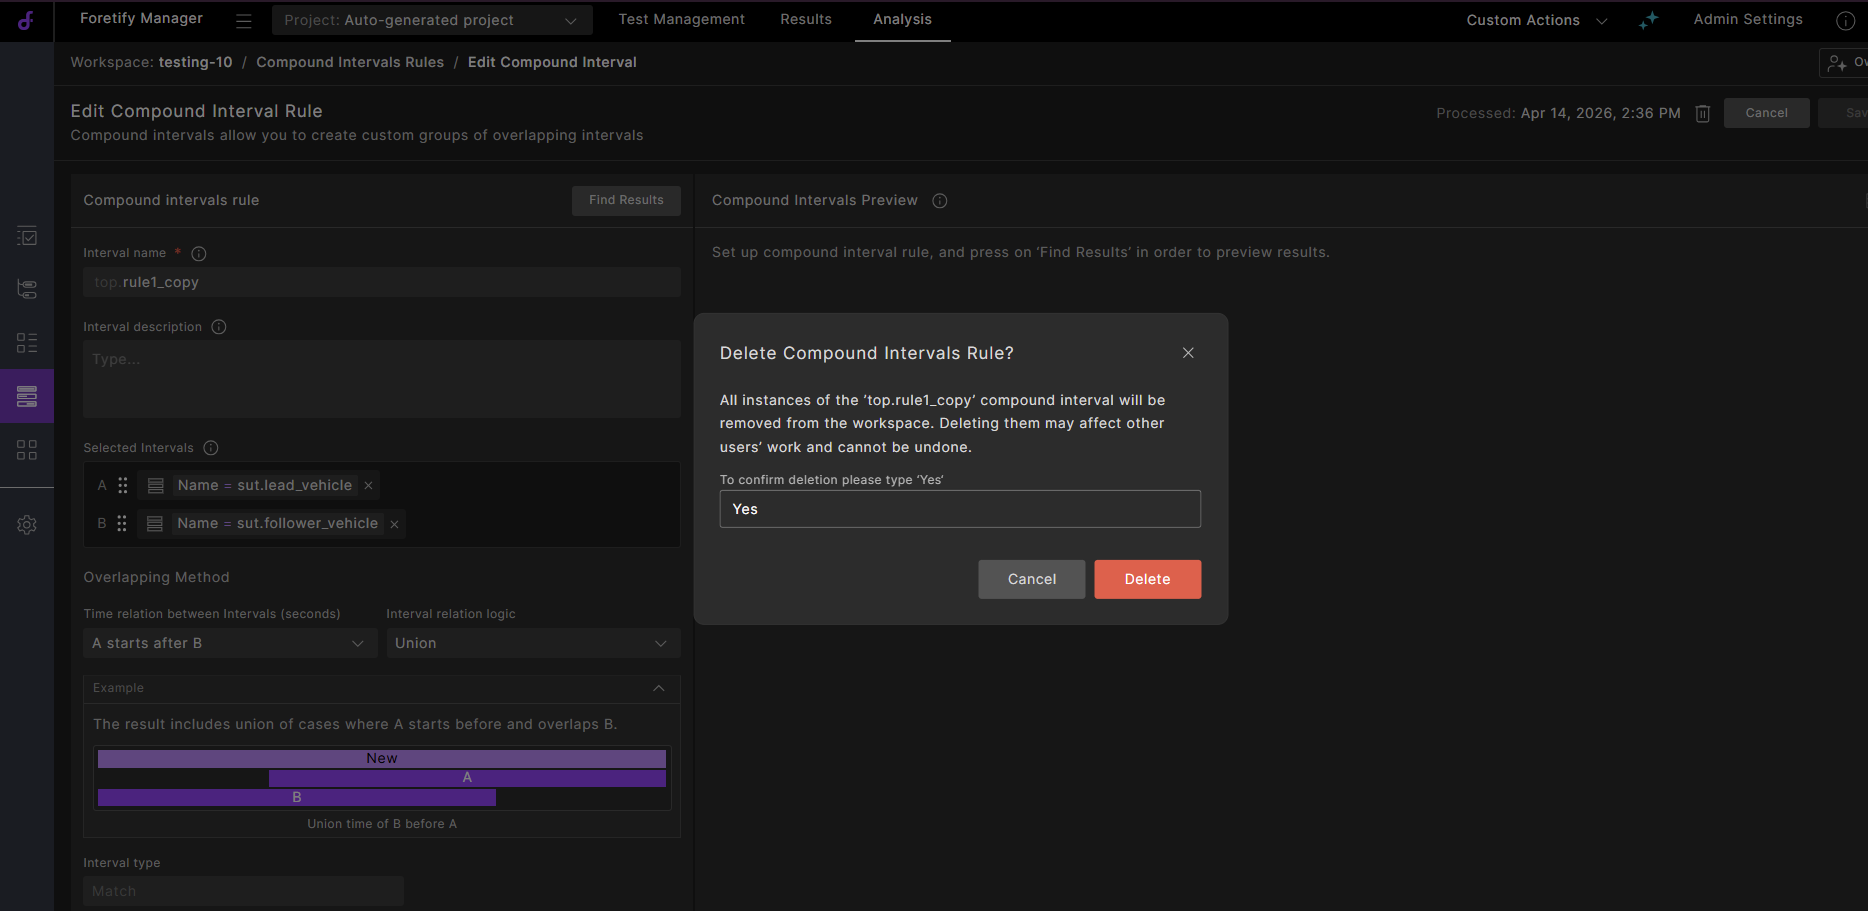
51.2.2.2 Delete a compound interval rule
Note
You must have an Editor or Owner permission to delete the compound rule.
-
From the Compound intervals rules tab, click the required rule.
-
Click the Delete icon.
-
Type Yes and then click Delete.
51.3 Advanced interval filtering
Use advanced interval filtering to filter intervals based on child interval metrics and attributes. It is applied on top of the Workspace filter and to intervals that belong to runs matching the Workspace filter.
You can apply the following types of filters:
- Filter scenarios, matches, anomalies, and global modifiers by their child coverage metric items.
- Filter scenarios, matches, anomalies, and global modifiers by their child watcher attributes.
- Filter watchers by their child coverage metric items.
The advanced filter is published and synchronized with the Workspace filter.
51.3.1 Performing advanced interval filtering
-
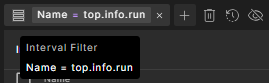
From the Intervals tab, click the Add Filter button then select Interval Filter.

Result: The Interval Filter widget is displayed.

-
You can filter intervals by interval name or by attribute values, as shown below:
a. Select an attribute from the first drop-down menu.
b. Select an operator from the second drop-down menu.
c. Enter or select the value to be compared in the third drop-down menu.
-
Click Add Child Condition to refine the selected interval filter.
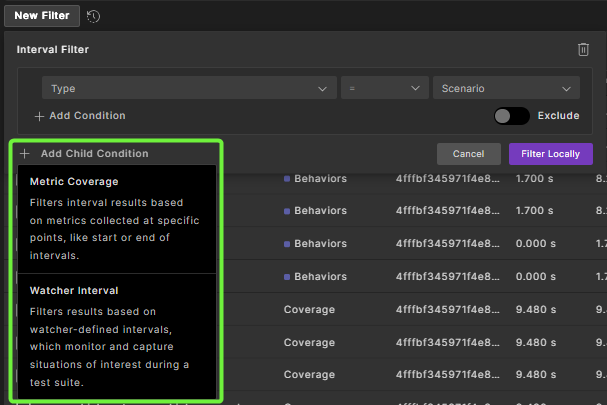
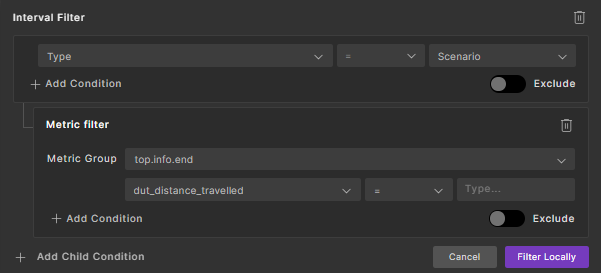
-
To filter based on the metric coverage, select Metric Coverage.
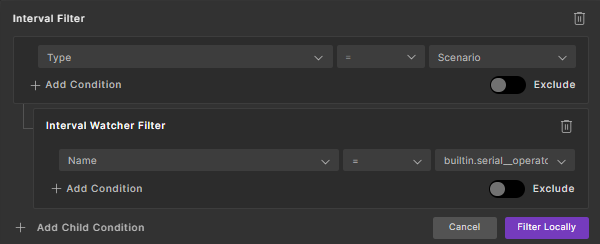
-
To filter based on the watcher interval, select Watcher Interval.
Notes
- When you select a specific interval name, the child filters display only the coverage groups relevant to that interval.
- All child filters must be of the same type, either metric filter children or watcher interval children.
-
-
Click the Filter locally button to perform the filter action.
Result: Filtered intervals are displayed.
To view the filter details, hover over the filter.
51.3.2 Configuring interval table metrics
To view all metric items associated with an interval, select the interval and click the Show all related metric items  icon.
icon.
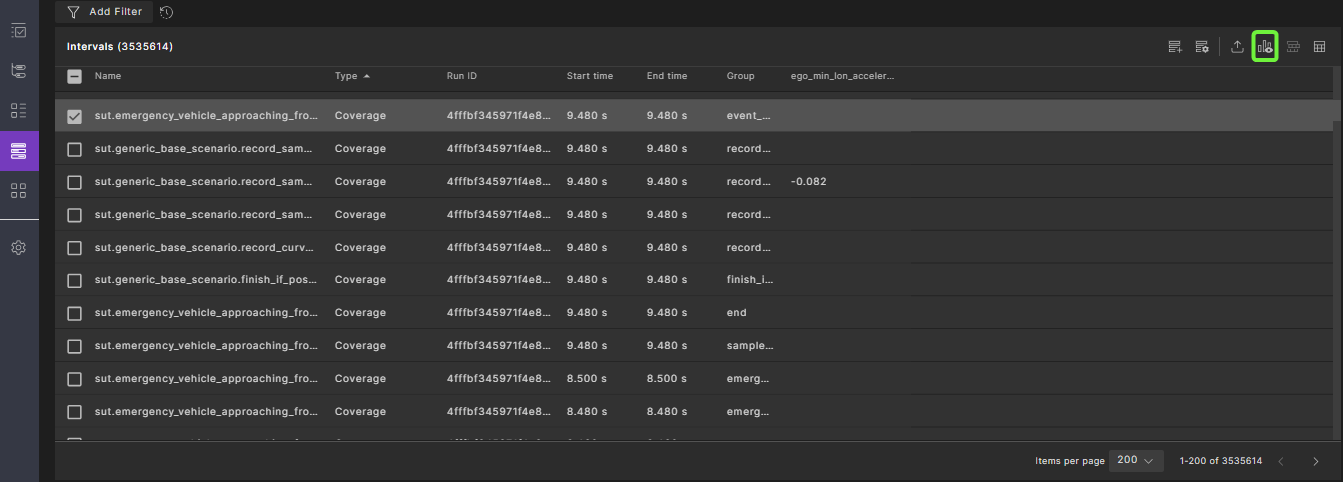
This action adds all metric items related to the interval to the table.
Note
This action removes any previously configured metric item columns from the interval's table without affecting the attributes.
To select specific metric items, you can:
- Open Column Selection in the context of a specific interval.
- Open Column Selection without any context.
To open Column Selection in the context of a specific interval, perform the following steps:
-
Select a single interval and click the column chooser icon
 to the left of Column Selection.
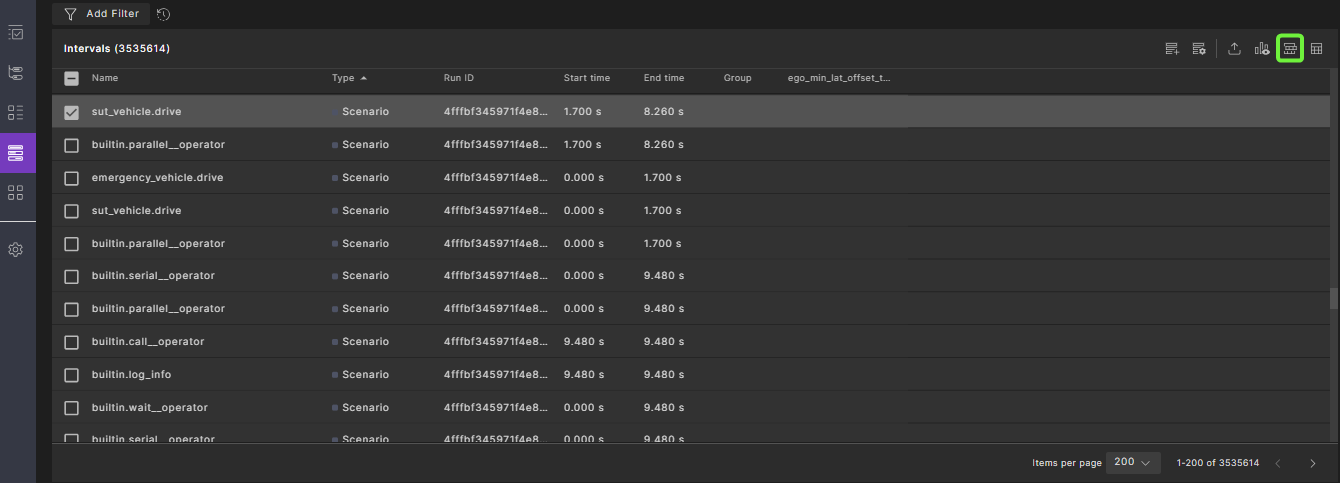
Result: The column chooser widget opens with the Metric Items tab filtered based on the selected interval.
-
Select one or more metric items, metric groups, or the entire scenario to add to the table view.

-
Click the Apply button.
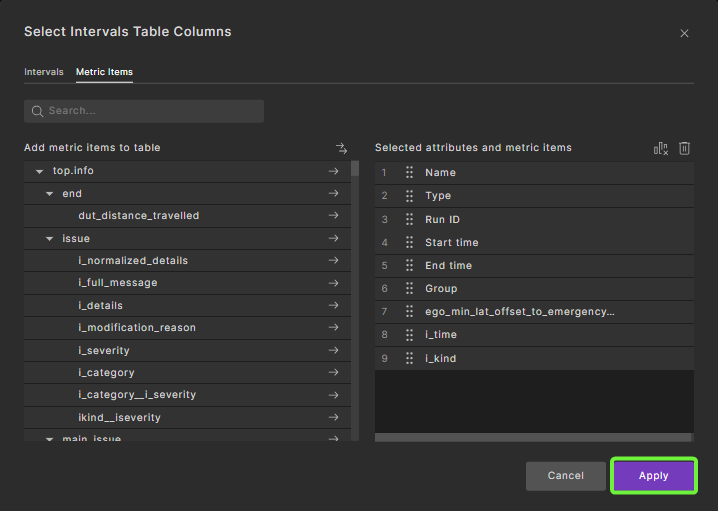
Result: The table view is updated.
51.3.3 Adding advanced interval filters in VPlan view
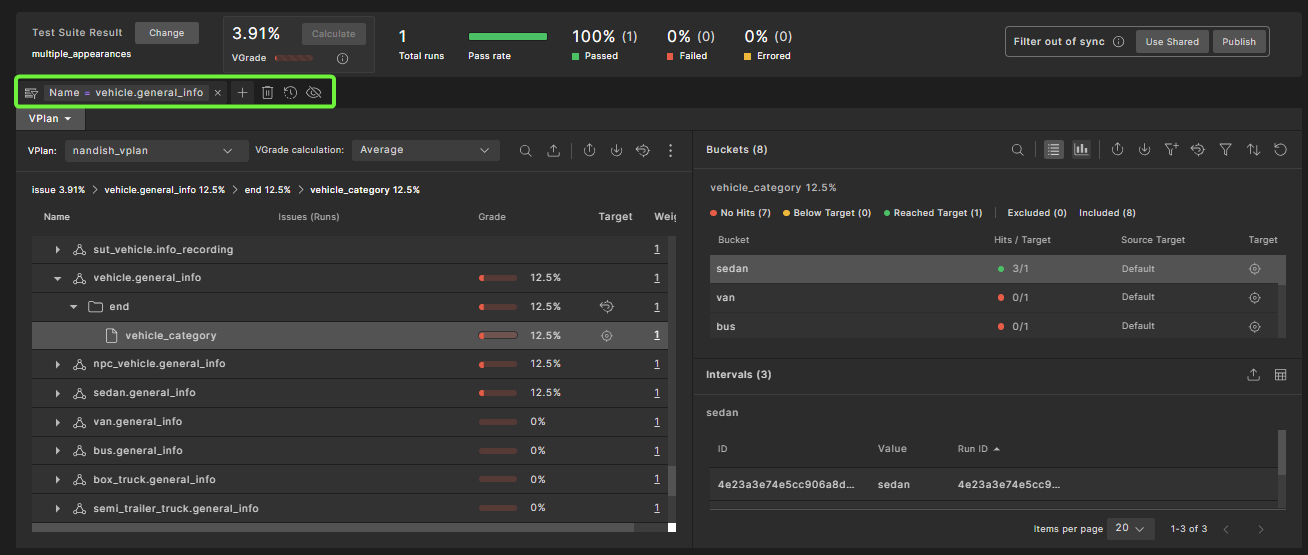
To add metric item filtering conditions from the VPlan view, select a bucket, click the Add To Filters icon, and then click Add Interval Filter.
![]()
The bucket filter condition is automatically added to the advanced interval filter.
51.3.4 Removing and clearing advanced interval filters
To remove an advanced intervals filter, click the Remove Filter (✖) icon. To remove all filters, click the Remove All Filters (Delete) icon. This resets the filter and returns you to the intervals table.
